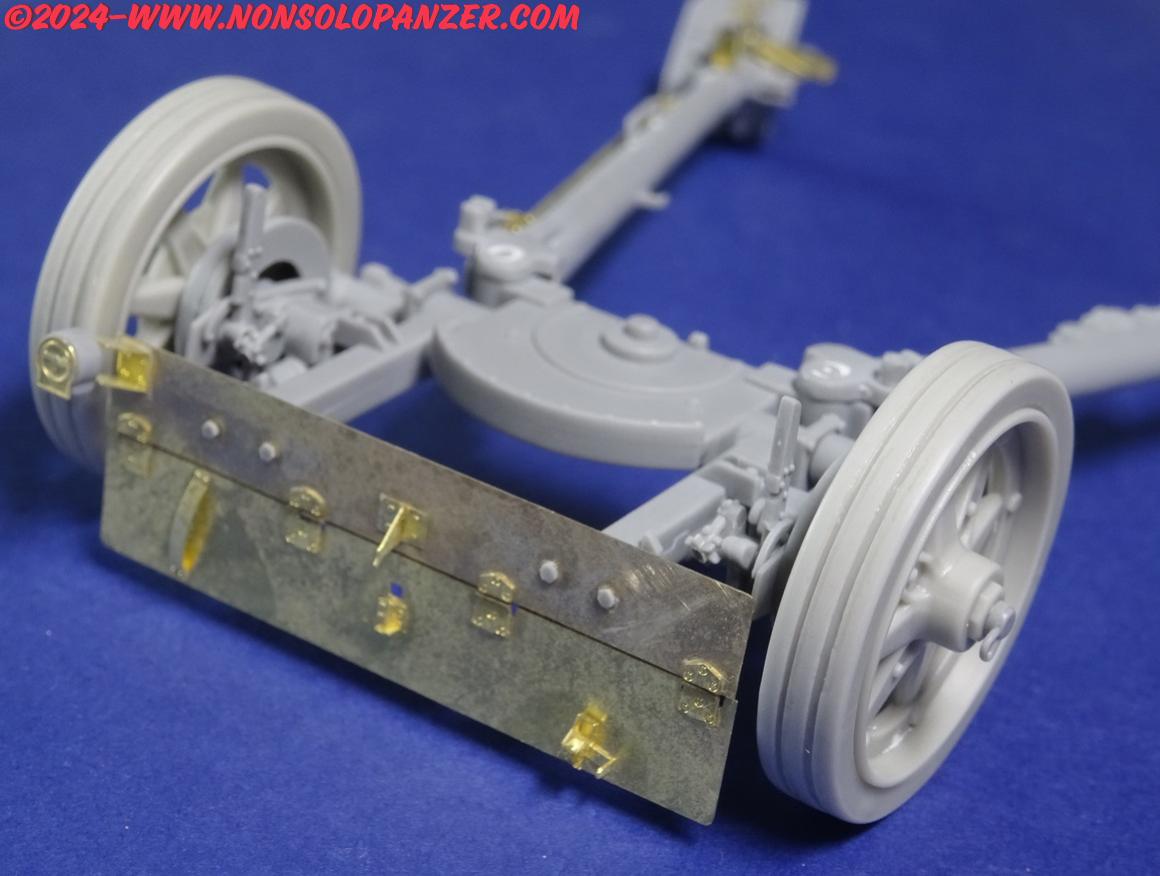
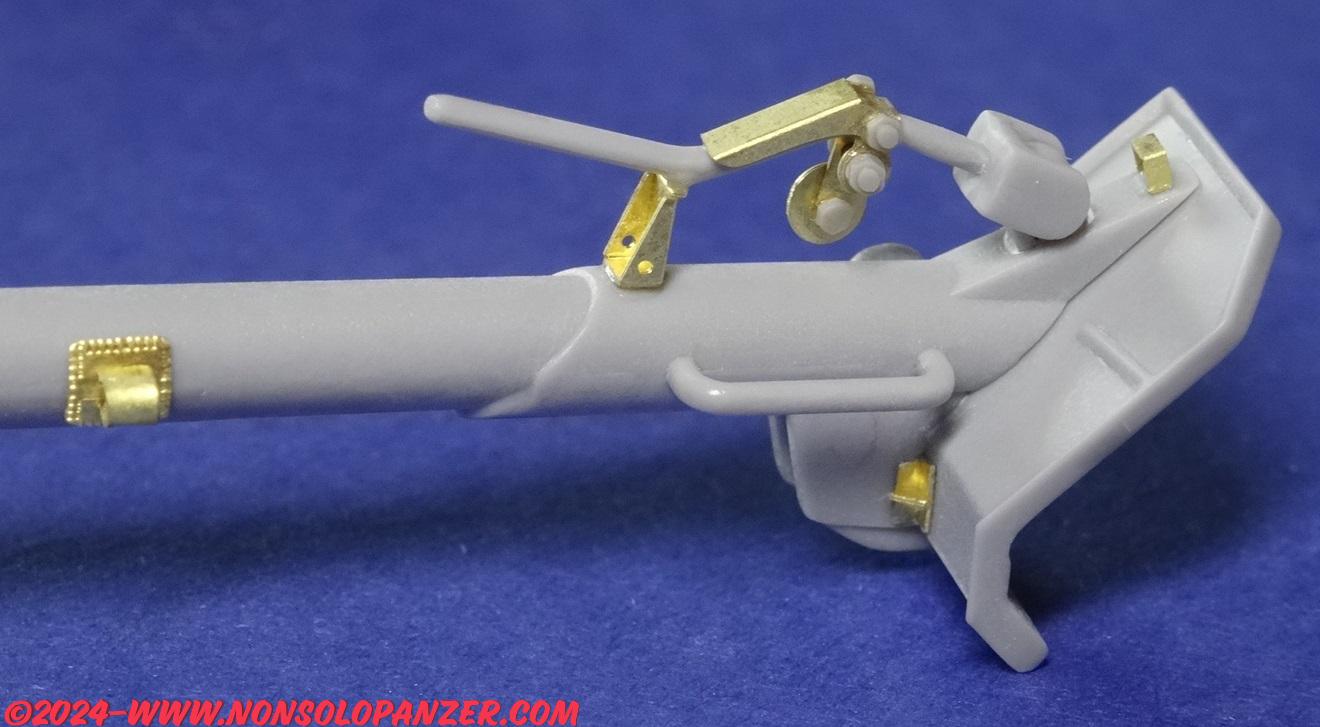
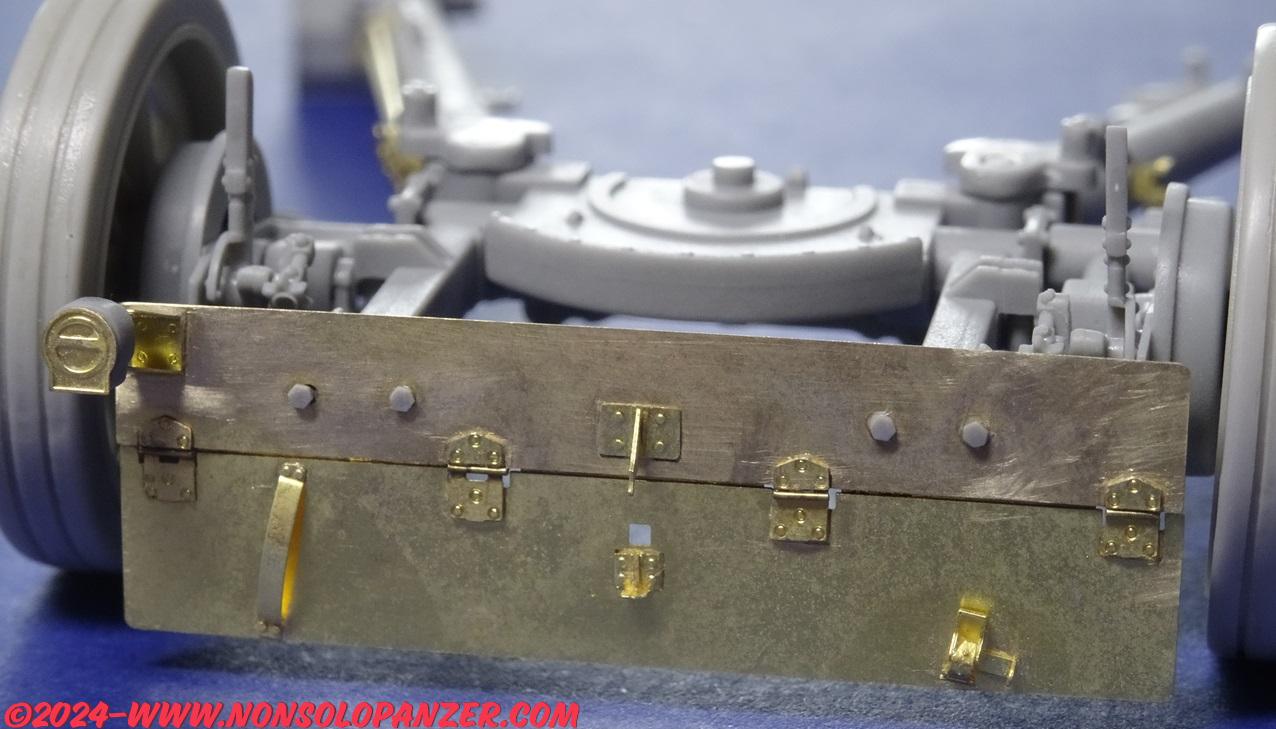
Benché non sia stato diligente nel mostrare su questo blog un accurato step by step dei lavori sul modello Dragon del 7.5cm Pak-40, ho portato a termine circa l’80% di questo soggetto, mia attuale impresa modellistica. Qui di seguito affiderò soprattutto alle immagini la narrazione di quanto fatto. Così facendo, spero di aiutare chi volesse prendere ispirazione dal mio lavoro evitando descrizioni potenzialmente tediose. Colgo però l’occasione per segnalare l’importanza di procurarsi testi accurati e foto storiche del soggetto che volete realizzare in scala. Spesso quest’ultimo è un aspetto sottovalutato soprattutto da coloro che confidano nella qualità dei modelli di ultima generazione. Benché le moderne scatole di montaggio siano nettamente superiori ai kit di quando ero ragazzino, la facilità di montaggio e la correttezza storica non è necessariamente assicurata. Nemmeno fotoincisioni e set di dettaglio sono esenti da errori. Non fanno eccezione questo modello Dragon ed il set di E.T Models con cui ho tentato di migliorare il mio Pak-40.
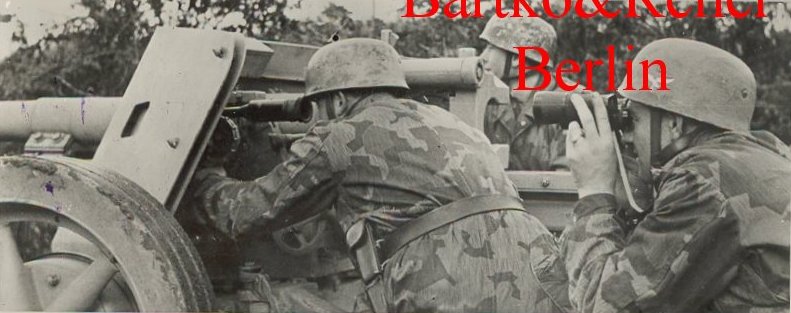
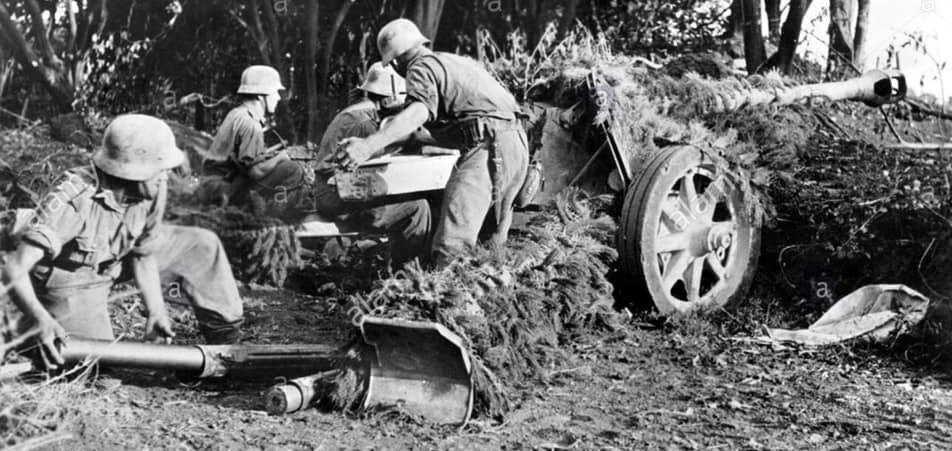
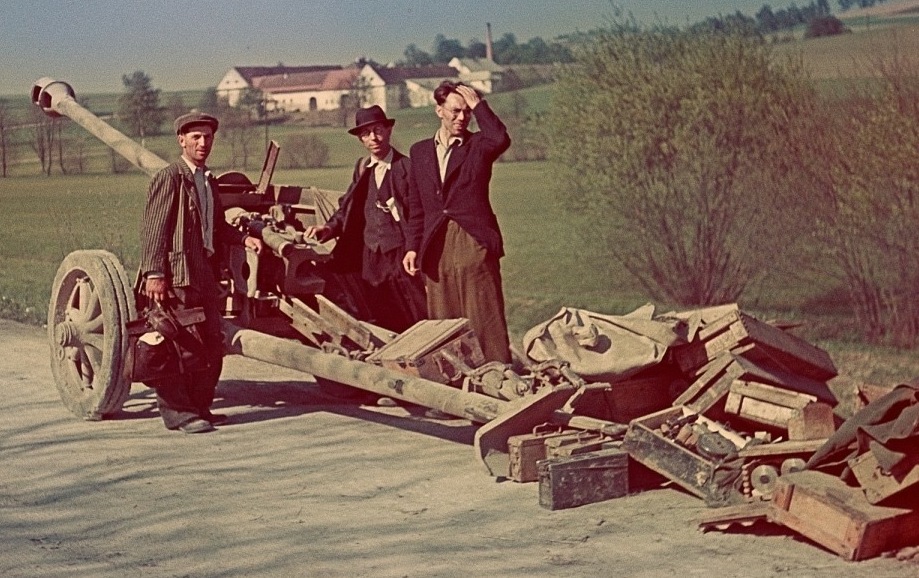
Credo che il risultato dei miei sforzi sia apprezzabile ma è stato possibile solo grazie alla disponibilità di alcune pubblicazioni ricche di profili tecnici, foto storiche, informazioni ed immagini di esemplari attualmente custoditi in musei e collezioni private. Altrettanto utili sono state le foto da me scattate ai 7.5cm Pak-40 ammirati dal vivo nel corso dei miei pellegrinaggi storico-militari. Tale materiale ha permesso di verificare l’accuratezza del modello Dragon e delle fotoincisioni E.T Models, compensare la mancanza di chiarezza di molti passaggi mostrati nelle istruzioni di montaggio, chiarire il funzionamento della meccanica del cannone. Aggiungo, benché banale, un altro consiglio: ogni pezzo va testato con cura prima di essere incollato soprattutto per accertarsi che sia effettivamente possibile l’assemblaggio proposto dalle istruzioni. Su quest’ultimo aspetto nutro molti dubbi considerate le numerose volte in cui ho preferito procedere ad intuito personale. Iniziativa che, va detto, mi ha garantito un assemblaggio del cannone facile e lineare.
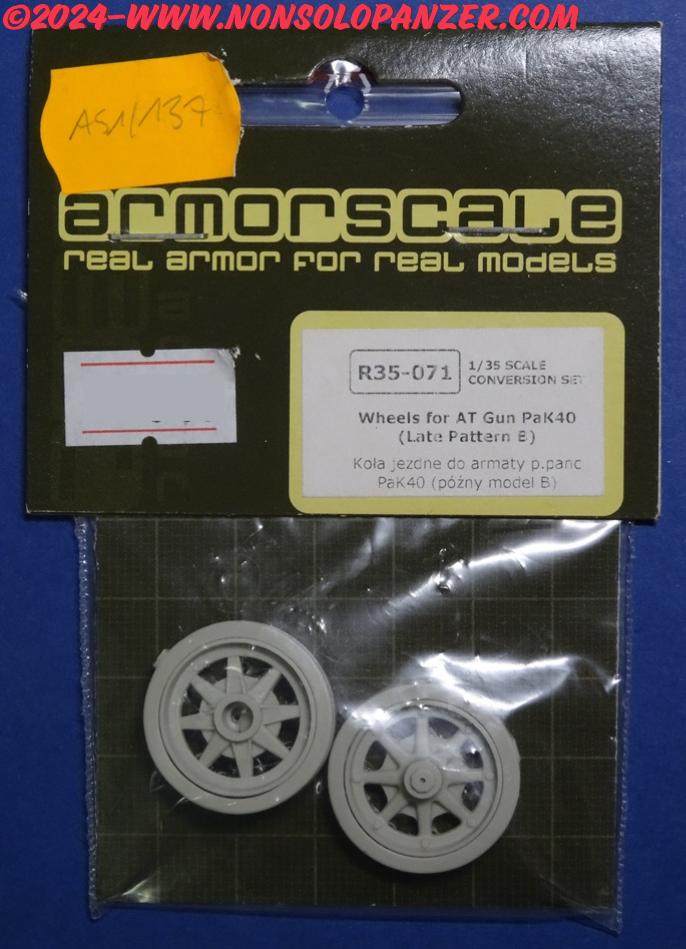
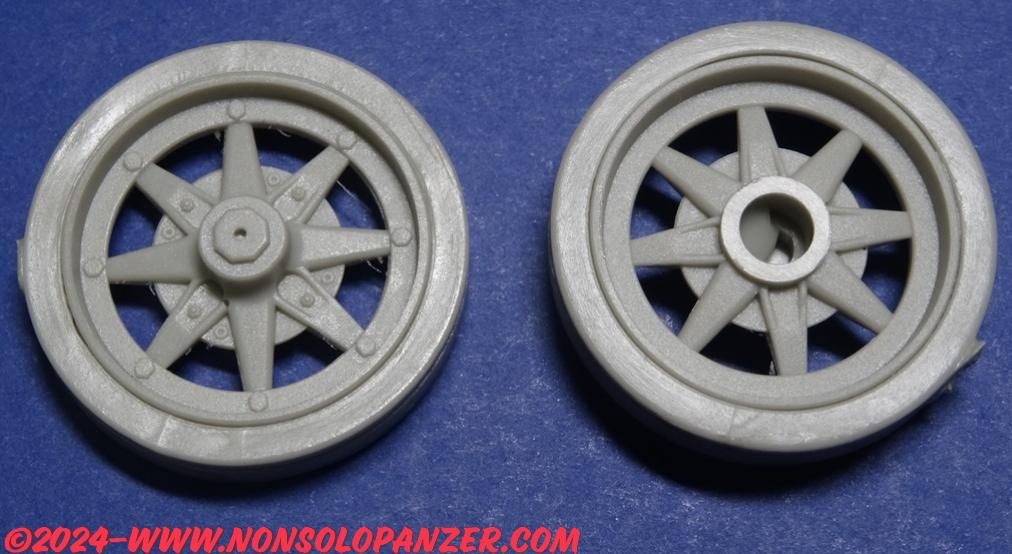
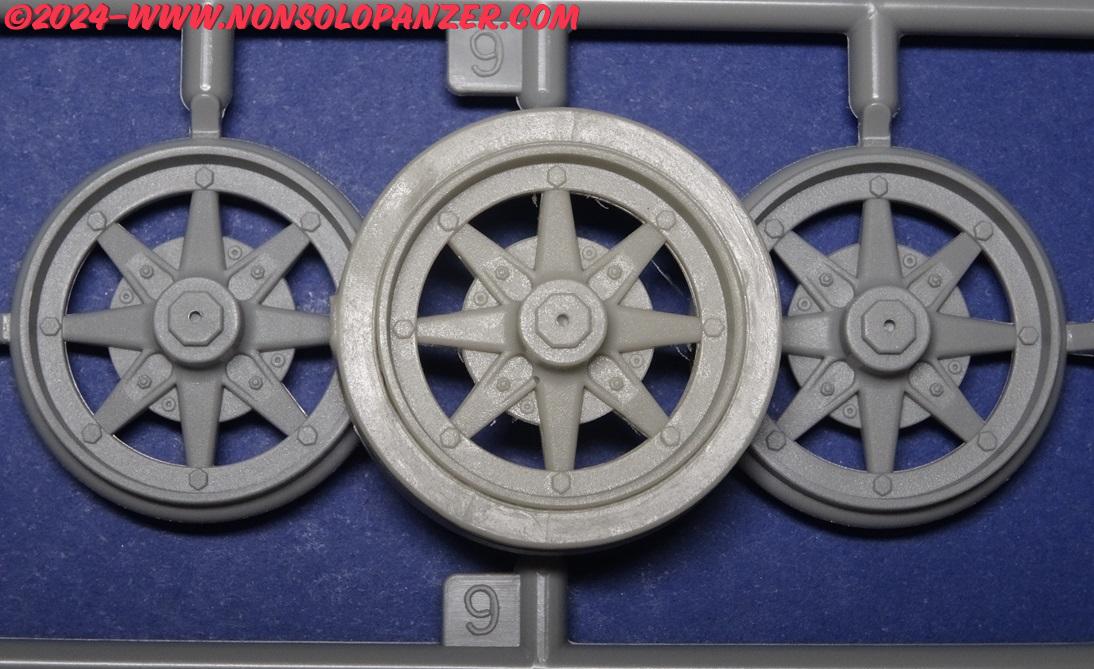
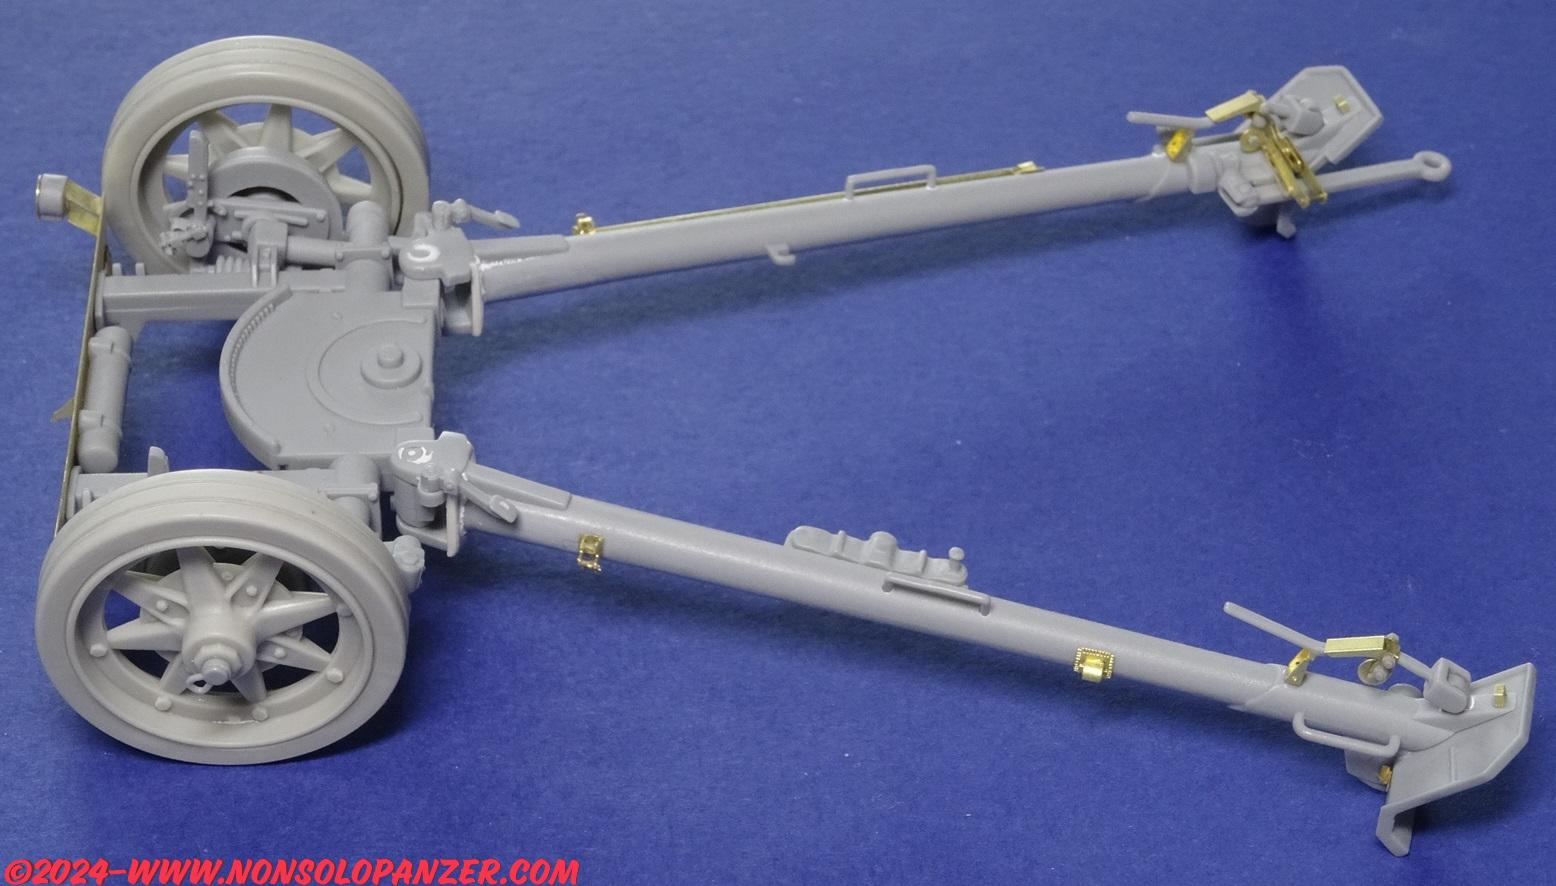
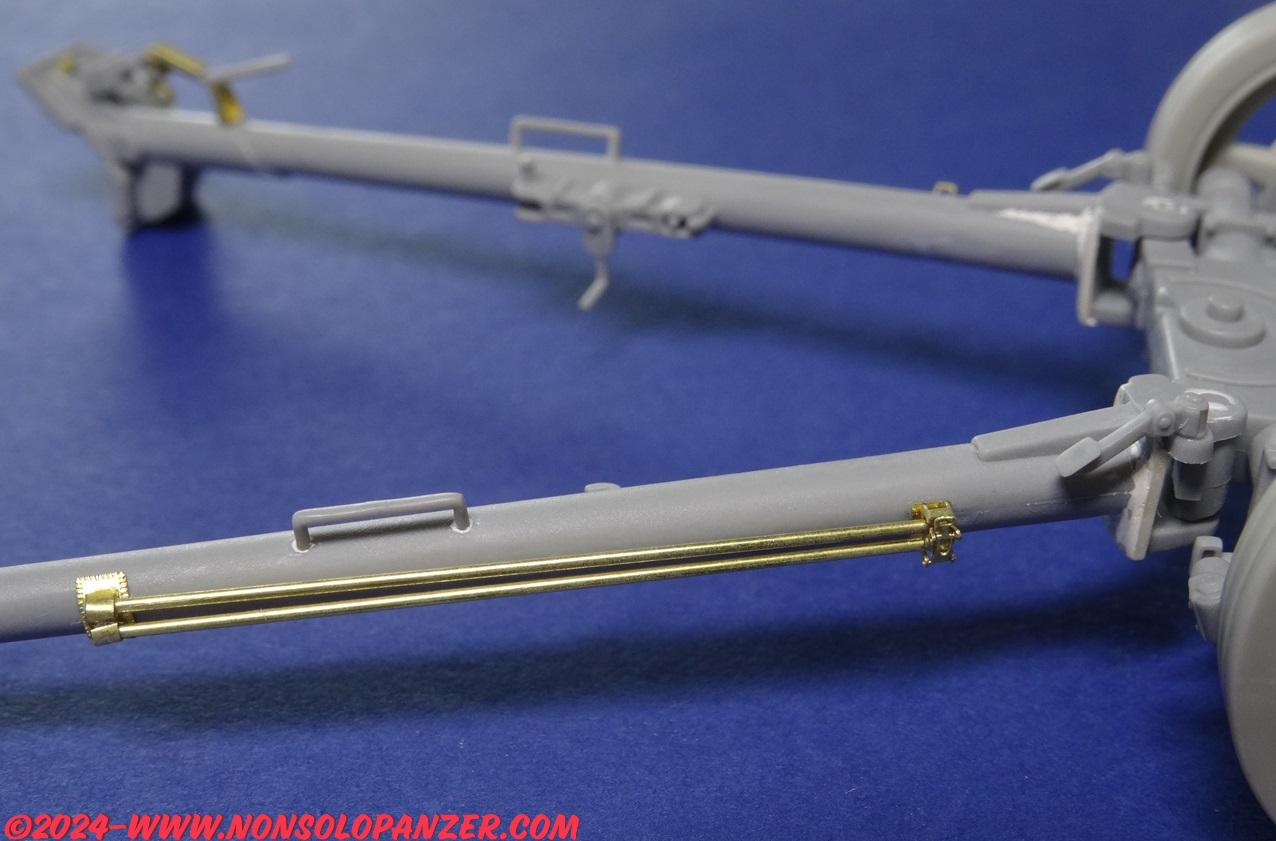
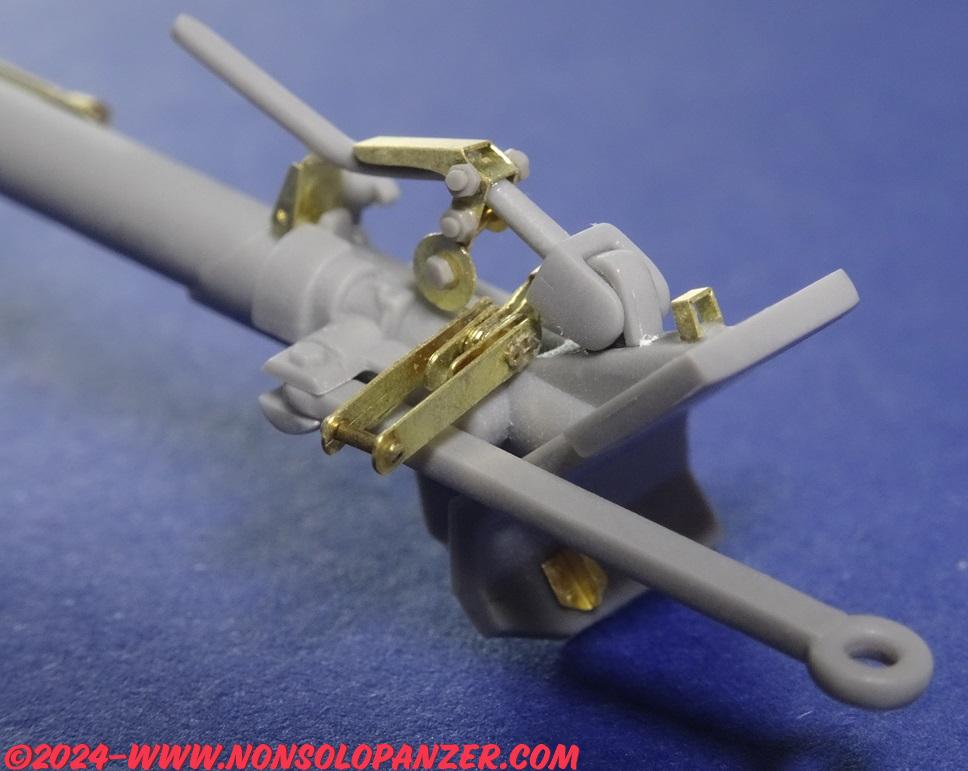
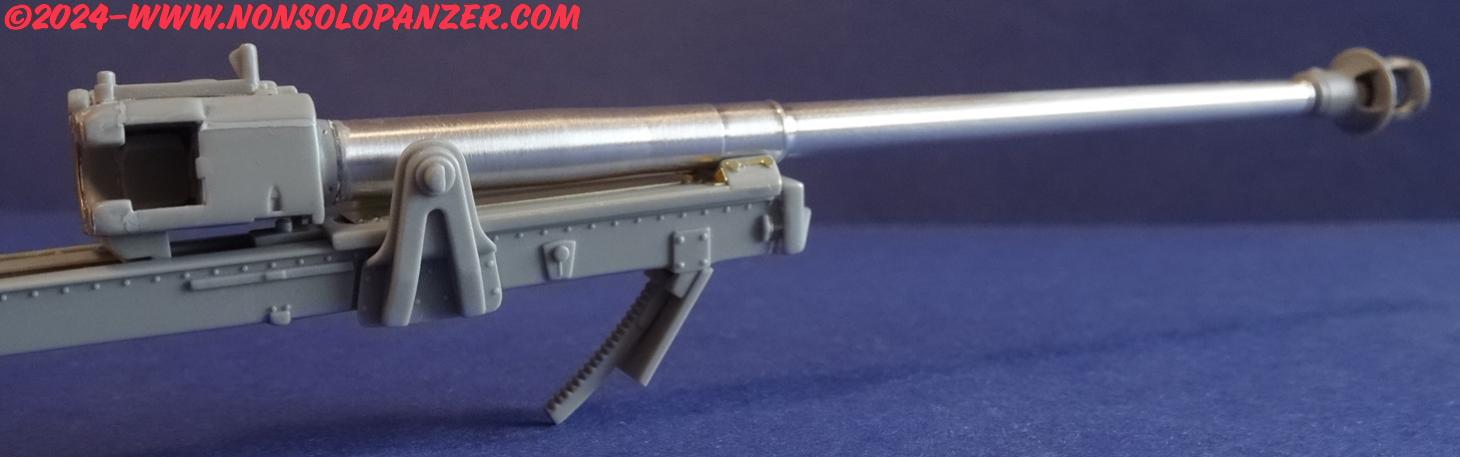
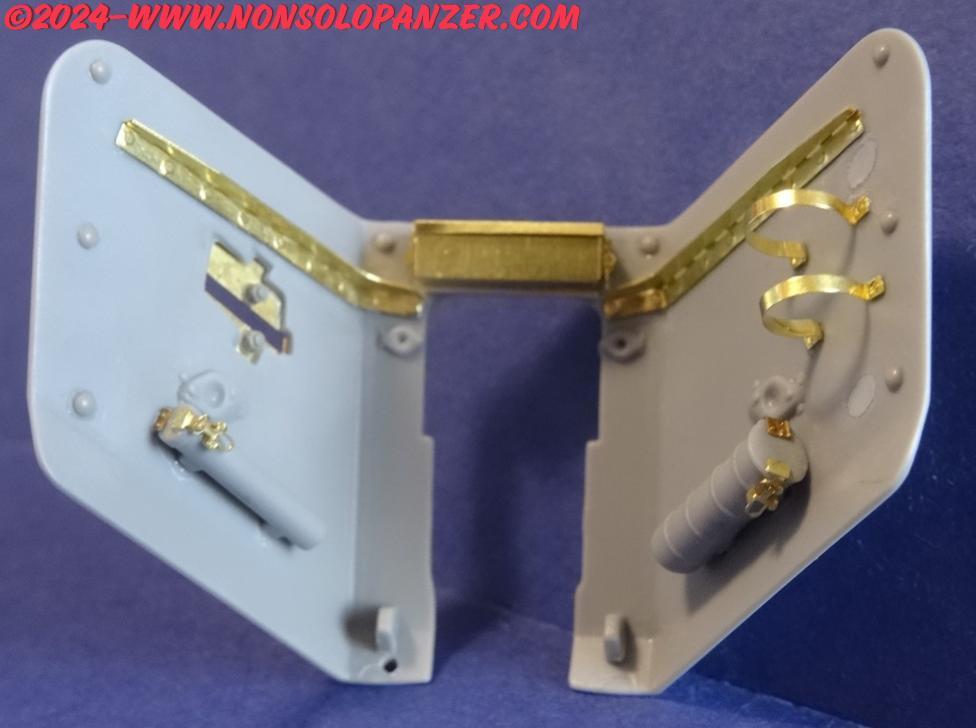
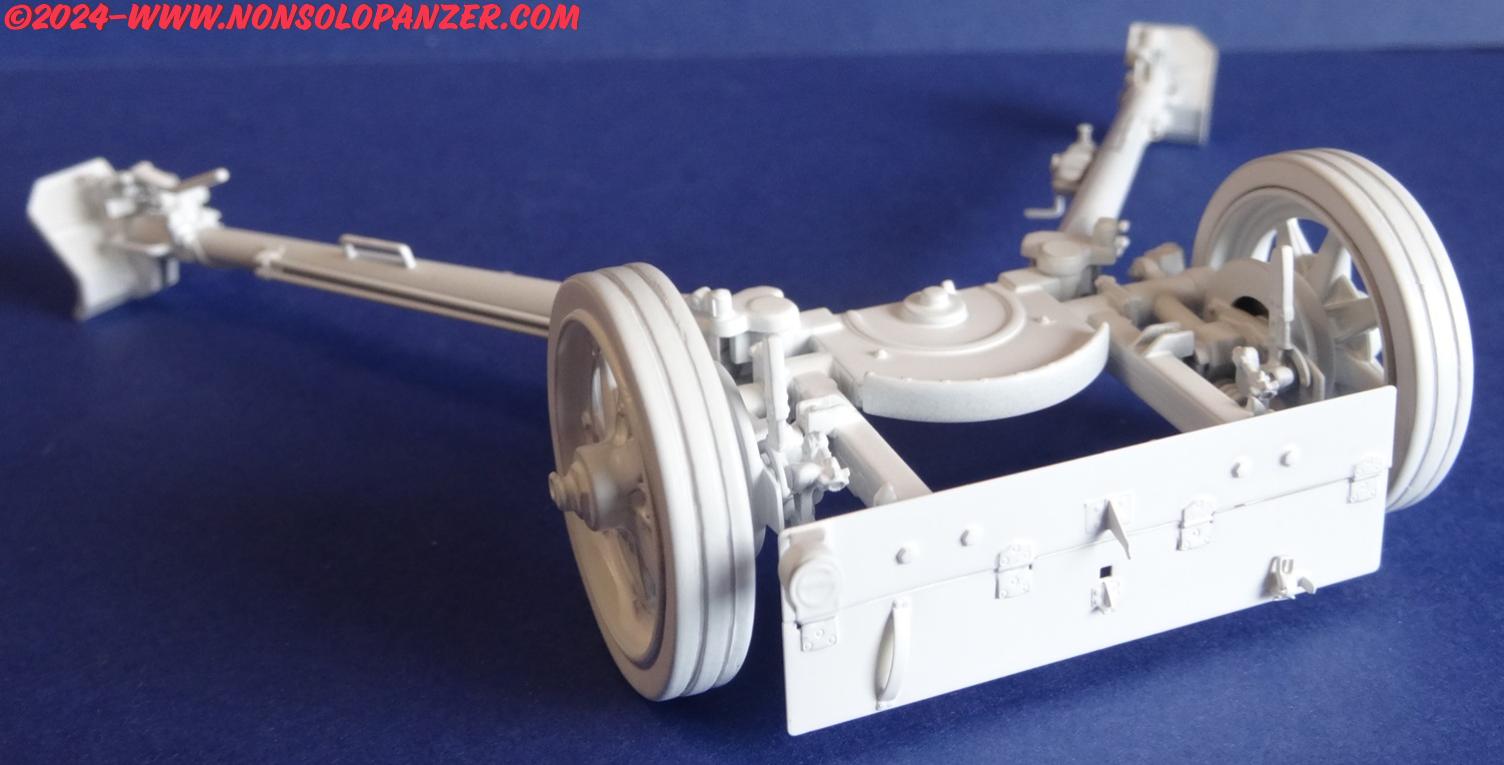
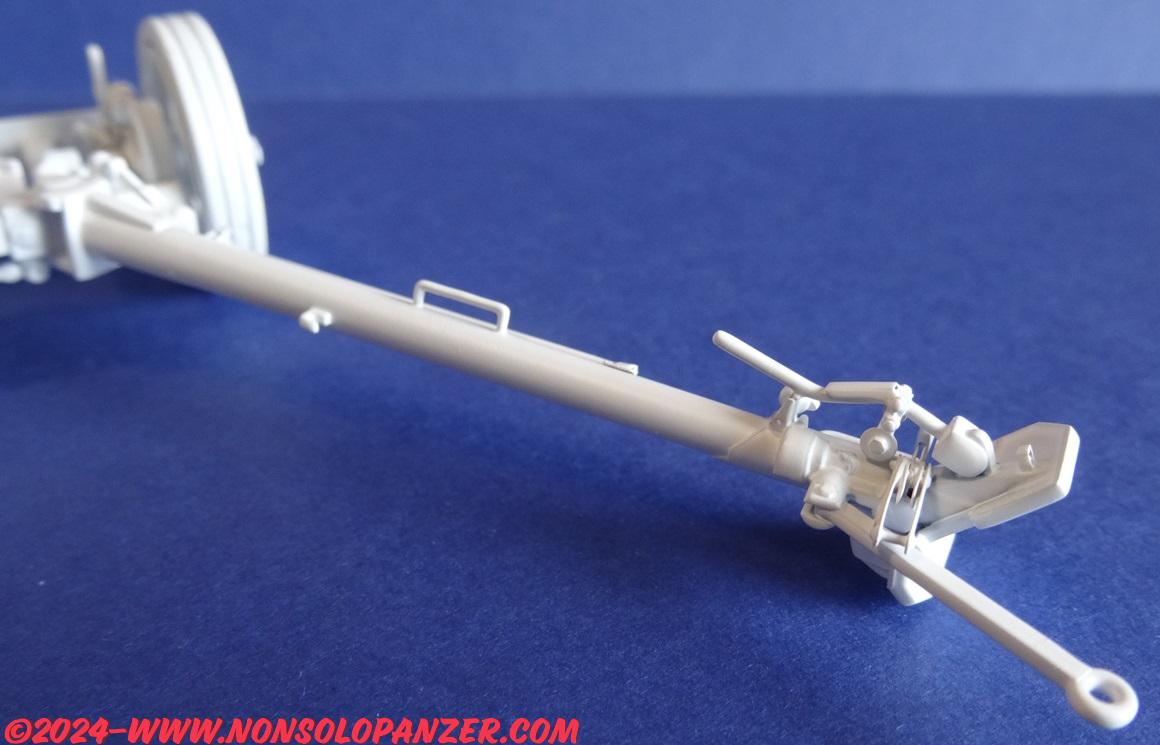
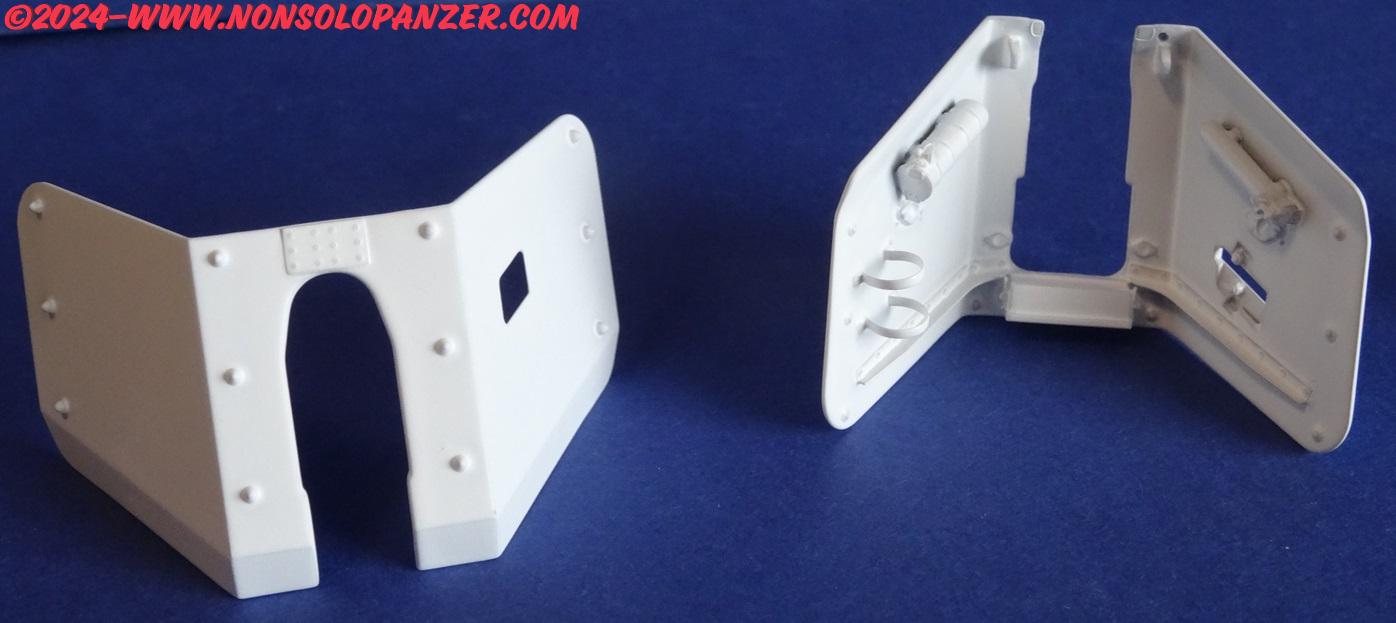
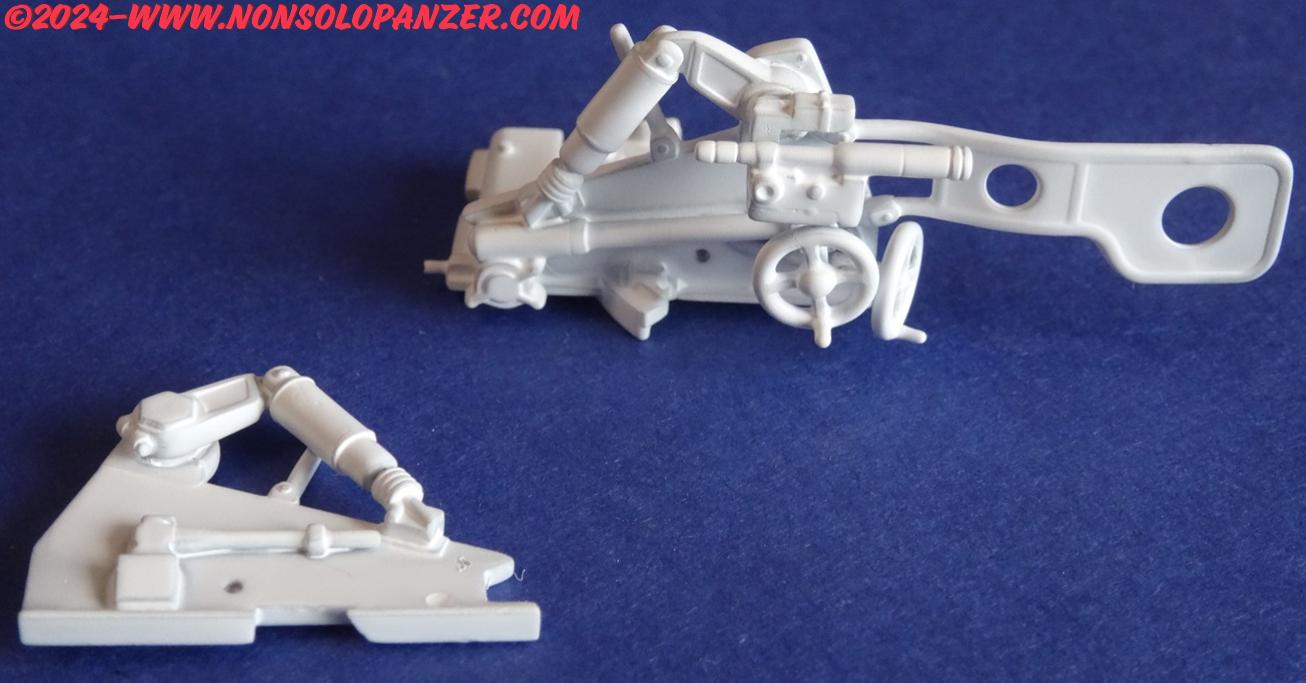
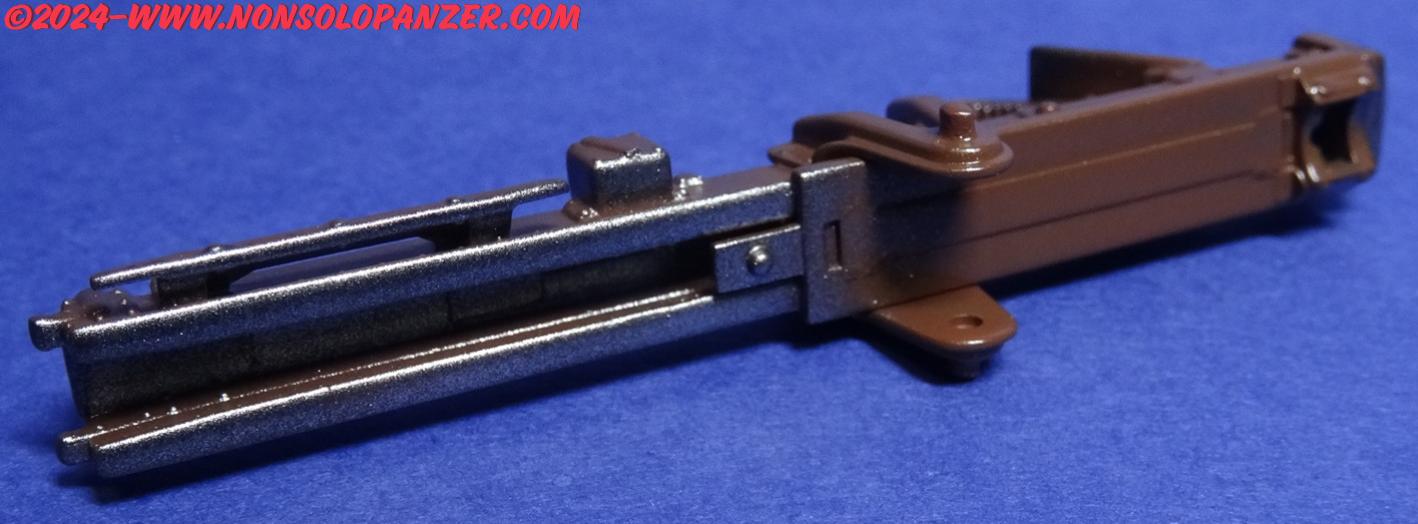
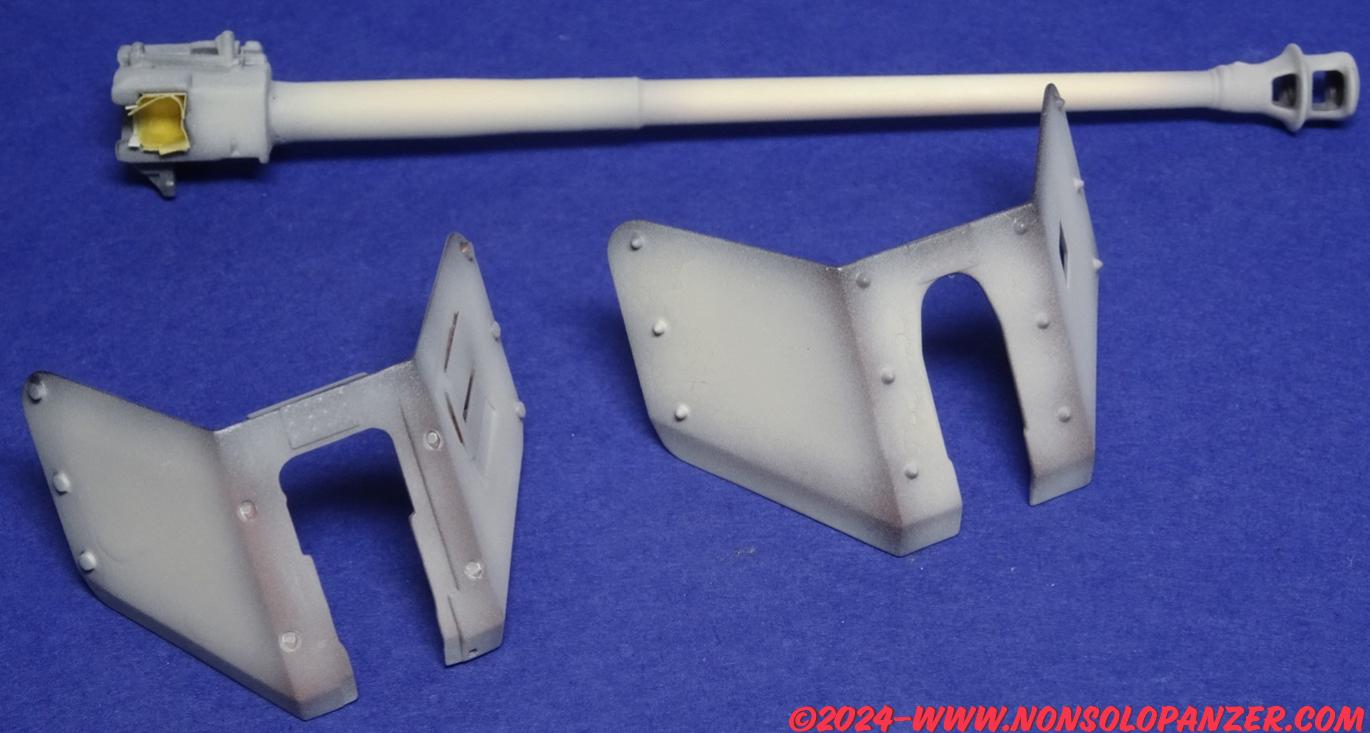
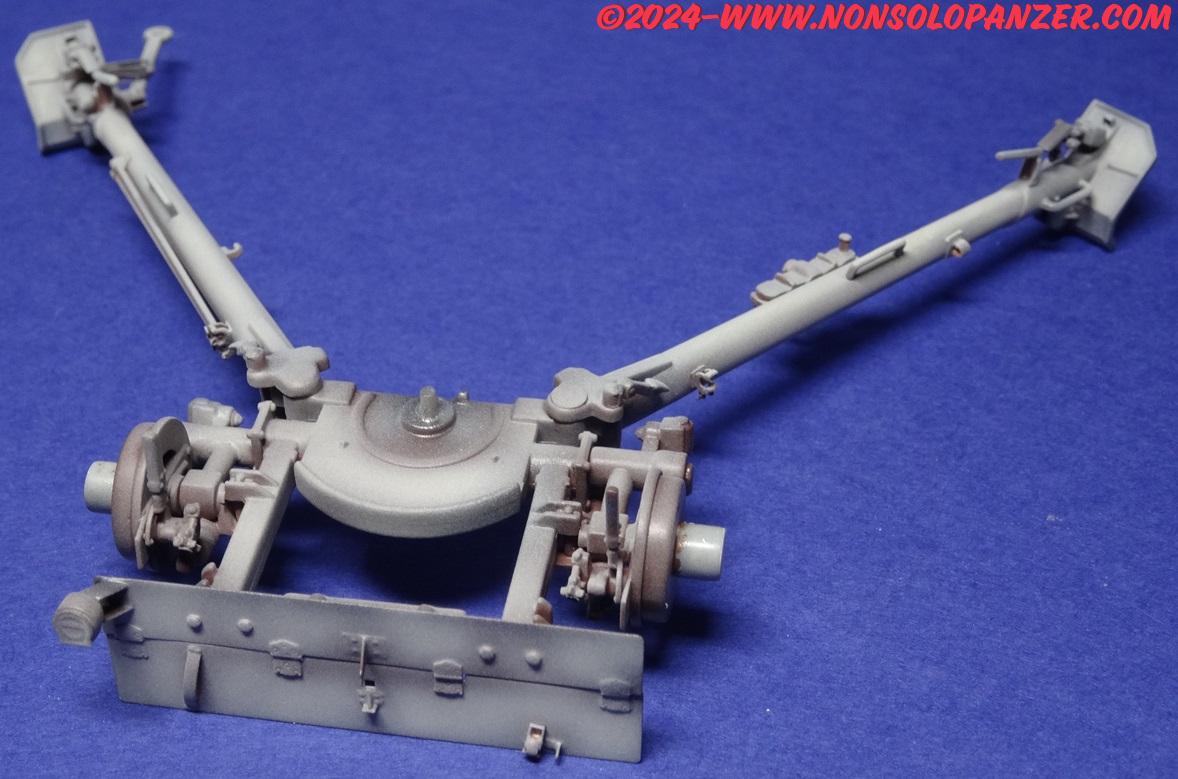
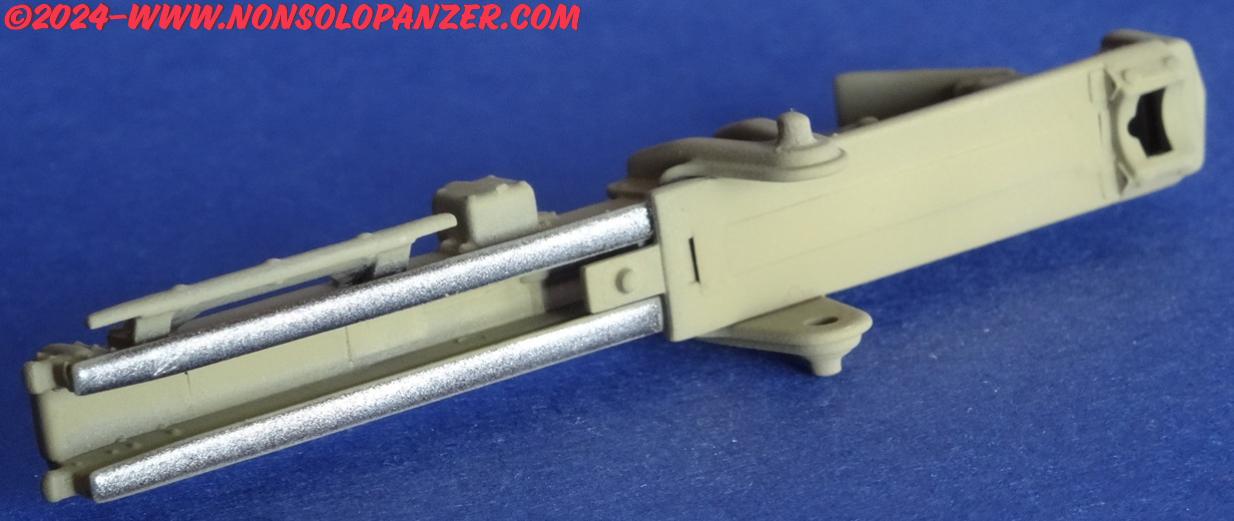
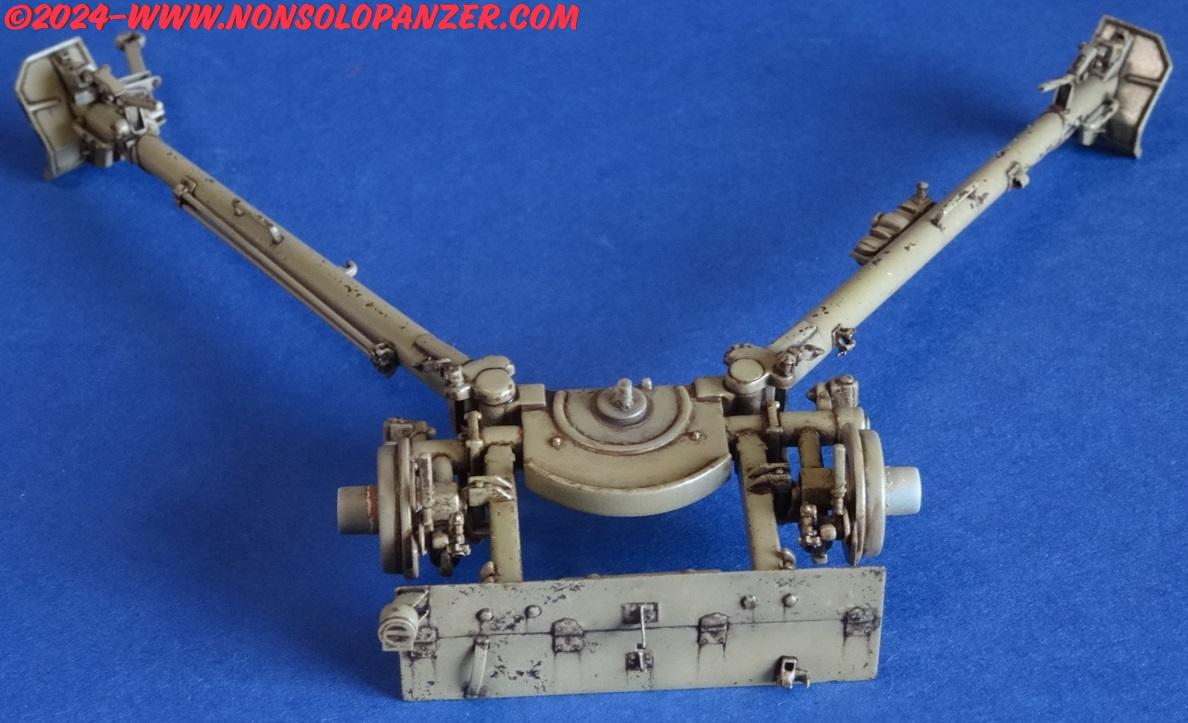
Recuperare informazioni tecniche e storiche ha anche una controindicazione: consente di acquisire una seria consapevolezza sulla scarsa accuratezza di un modello. Foto e schemi tecnici alla mano, vien voglia di rifare tutto. Le fotoincisioni compensano solo in parte poiché esse sono, in non pochi casi, inventate o inutilizzabili salvo eccessive complicazioni di montaggio. Per quanto concerne il kit Dragon, esso include una canna in metallo tornito che, almeno nel mio caso, era leggermente storta. Ho compensato posizionandola rispetto all’affusto in modo che il difetto non sia percepibile ma è un problema serio che giustifica l’acquisto di un sostituto, preferibilmente comprensivo di freno di bocca e culatta ben dettagliata. Stessa cosa per quanto concerne le ruote proposte dalla scatola di montaggio con il battistrada in gomma nera. Considerate le difficoltà di colorazione della gomma, ho preferito sostituirle con ruote in resina che, per onestà, non hanno alcun dettaglio aggiuntivo rispetto a quelle in plastica del kit.
Tutto ciò premesso, qui di seguito un rapido sunto dei vari step di montaggio/colorazione.
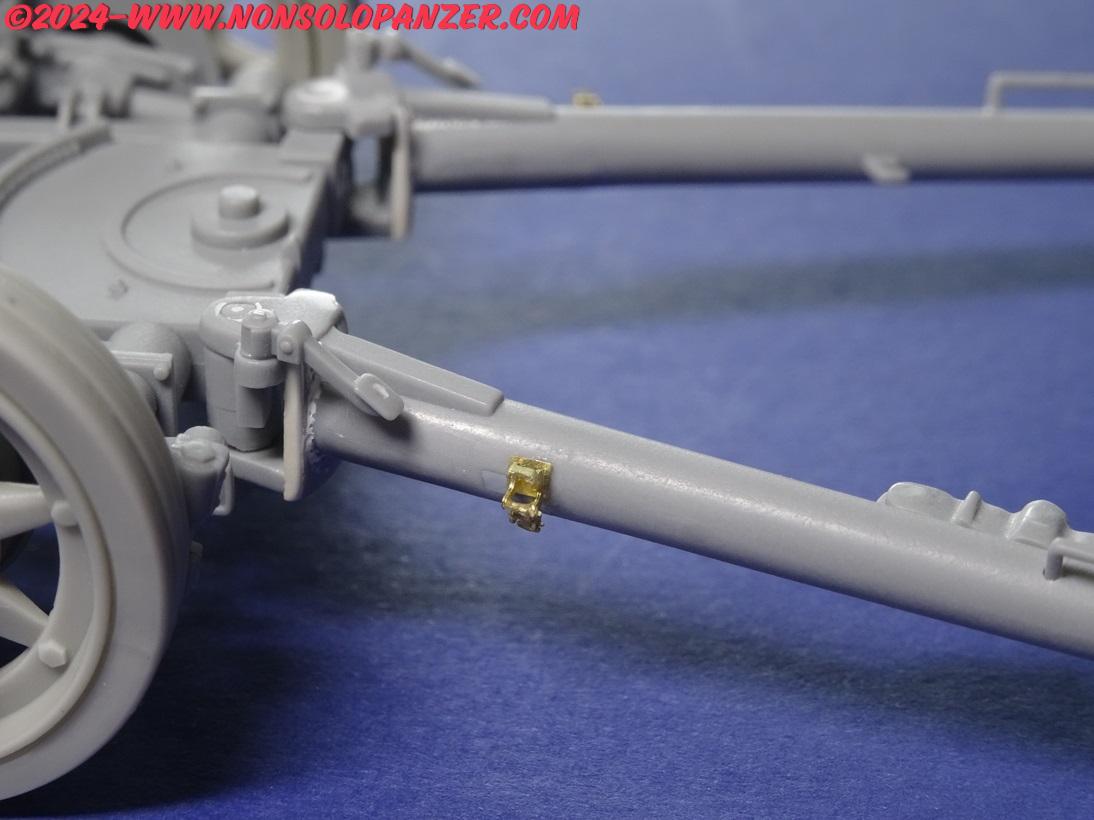
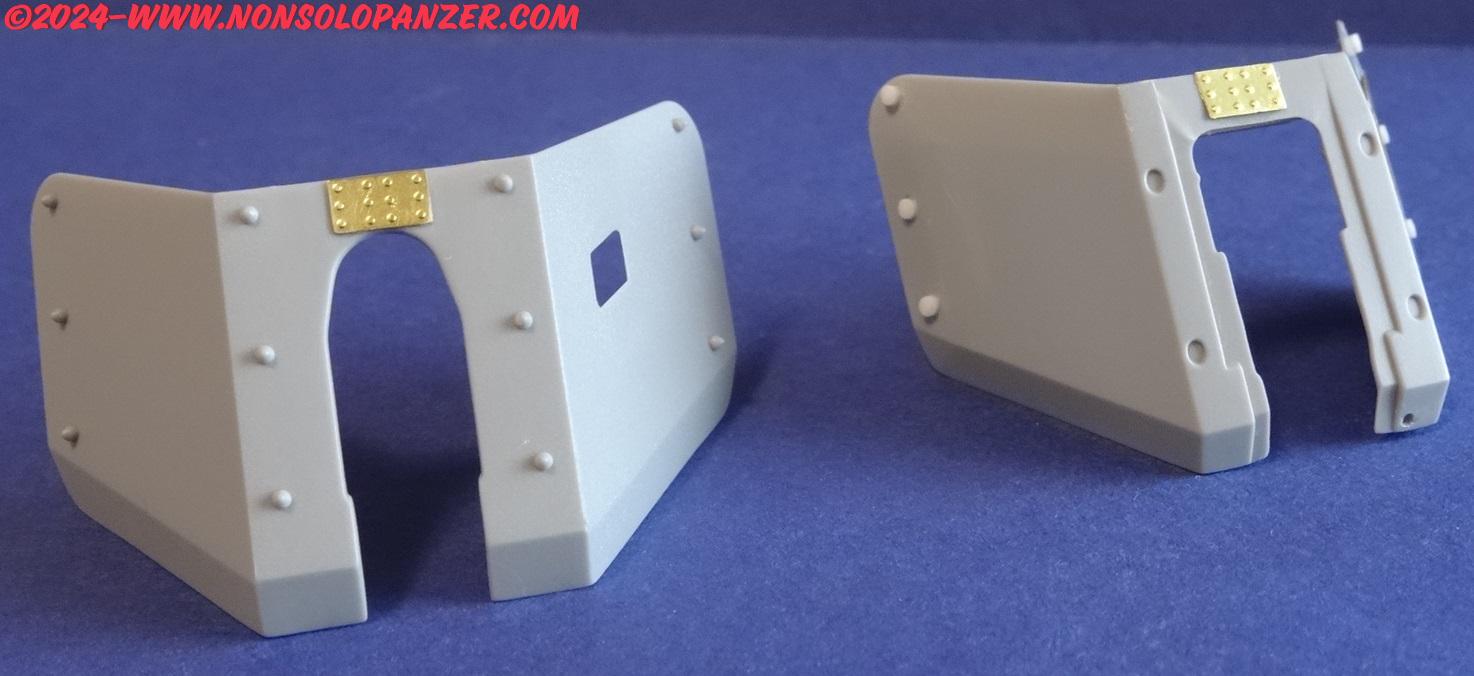
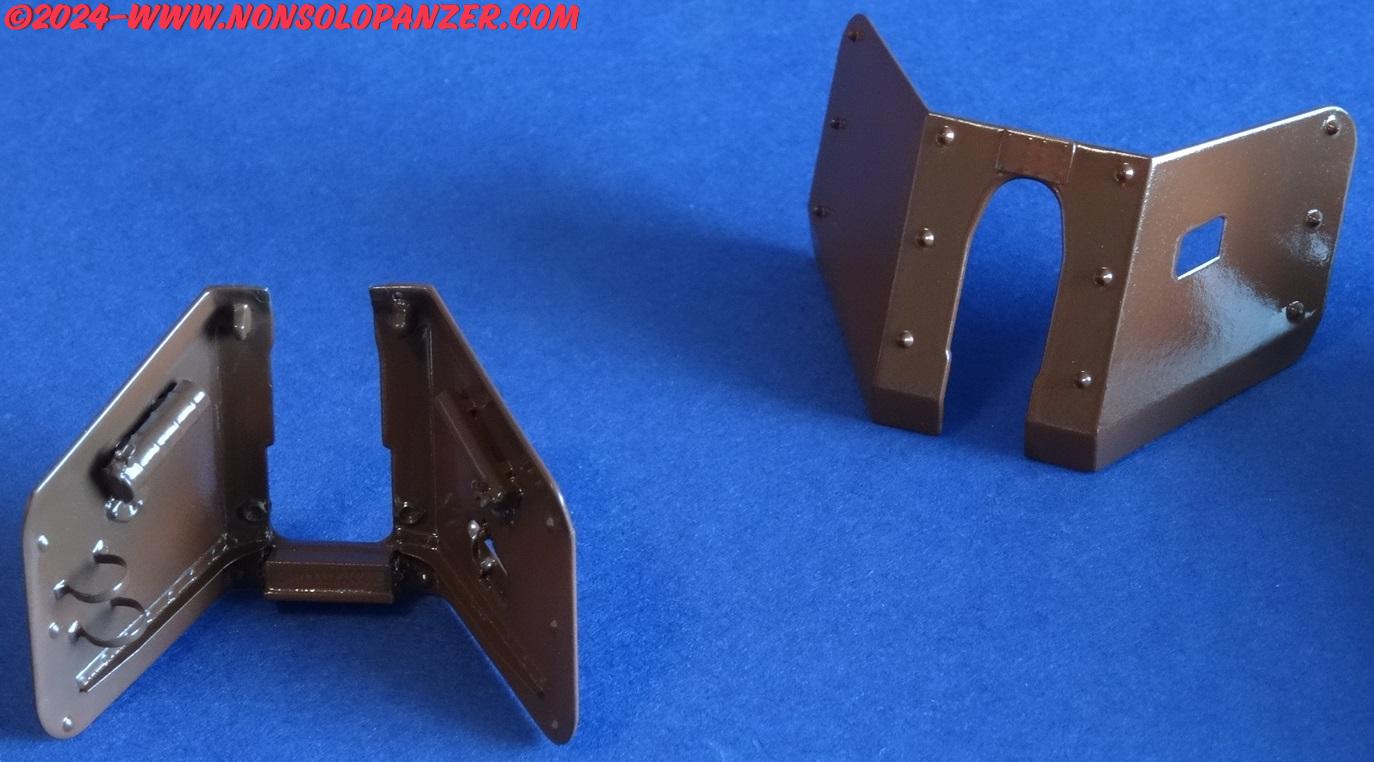
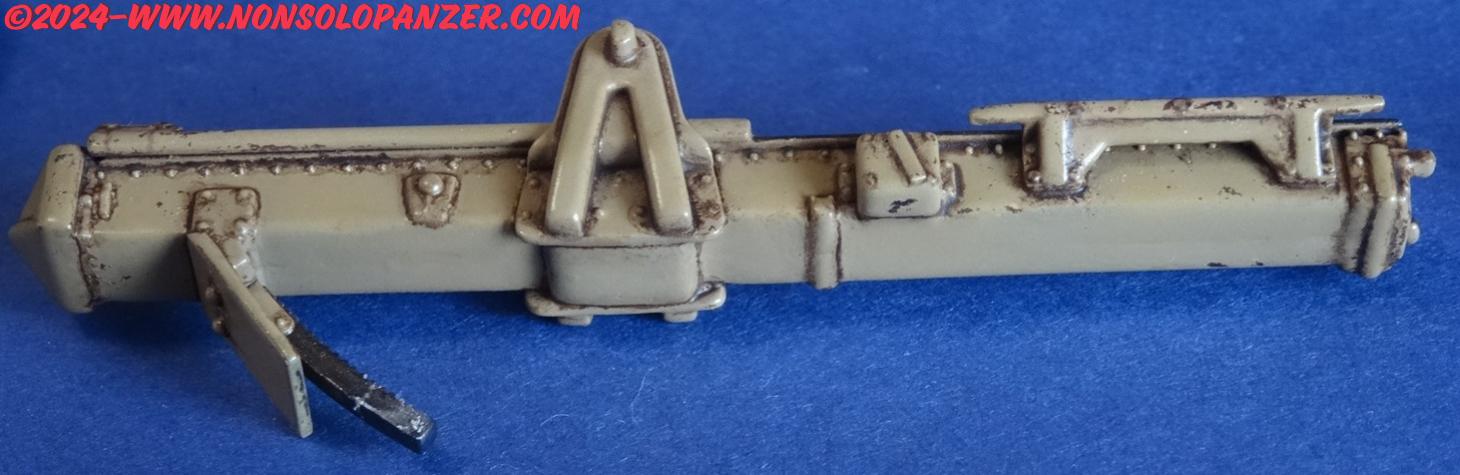
MONTAGGIO CON FOTOINCISIONI – i vuoti tra i vari pezzi sono stati riempiti con stucco bicomponente bianco, usato anche per simulare le saldature in alcuni punti.


PRIMER – ho disgraziatamente usato il primer Tamiya bianco per plastica e metallo che è risultato scarsamente coprente. A causa di ciò, ho dovuto stendere più mani che hanno creato uno spessore eccessivo.

BASE MARRONE – funge da fondo e primo fattore di modulazione del dunkelgelb (verso lo scuro).
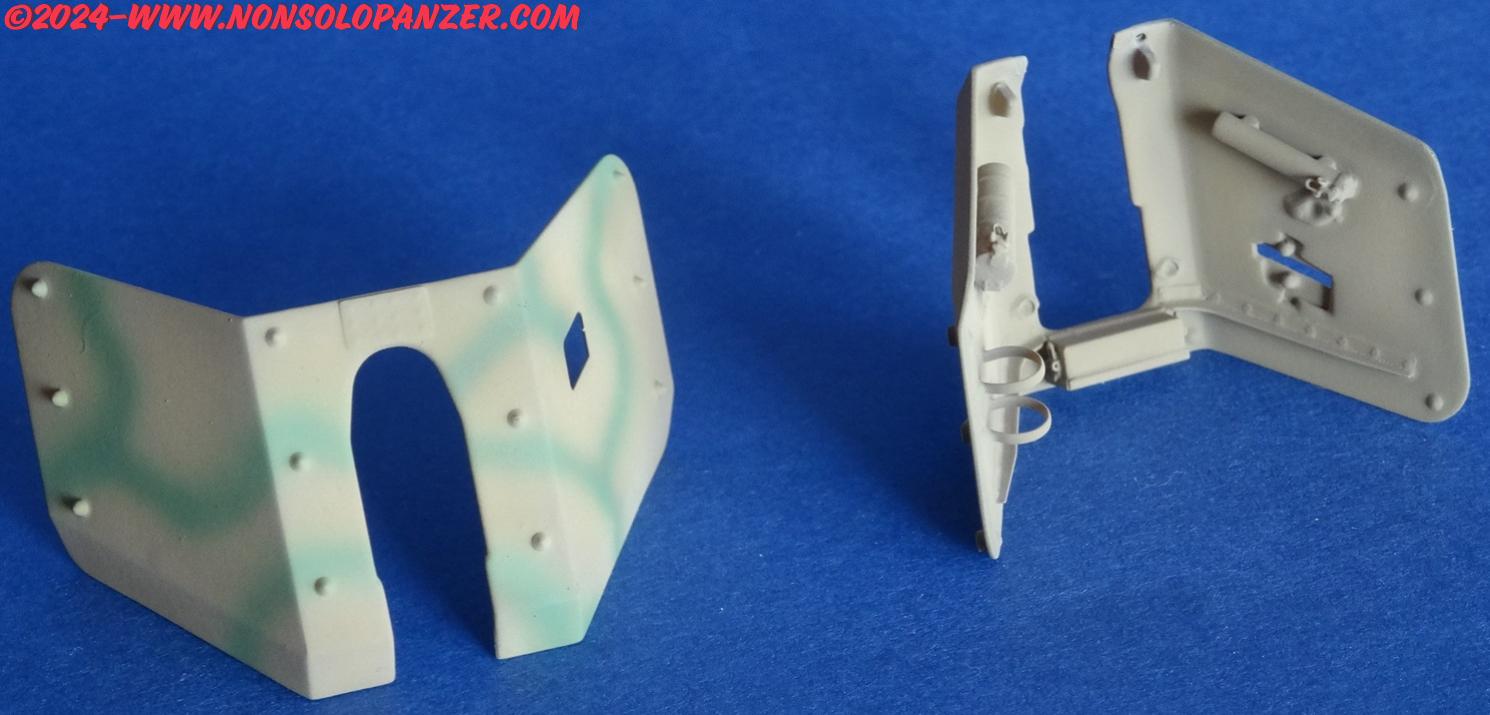
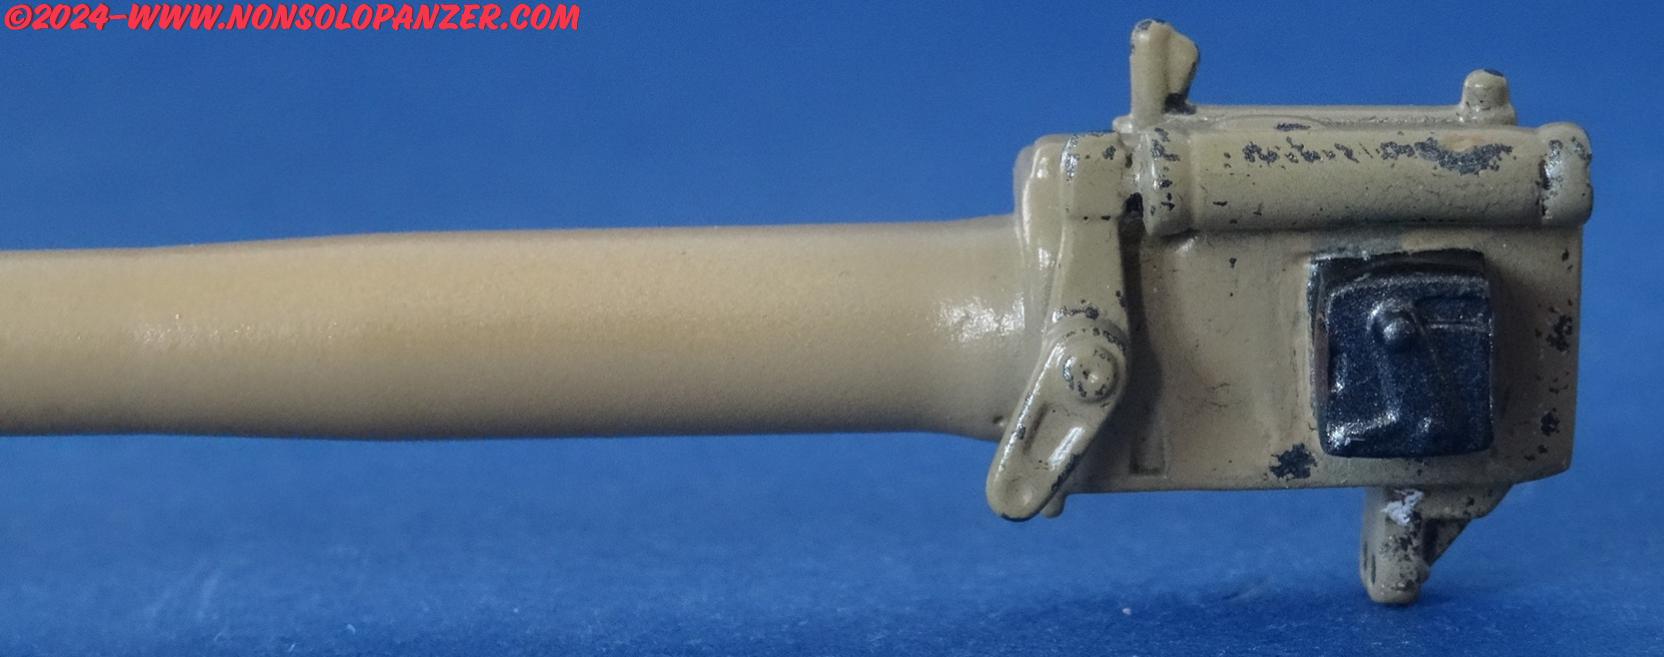
COLOR METALLO– è la prima volta che ho approcciato questa tecnica. Dopo aver steso ad aerografo del metallo scuro solo nelle parti in cui ho ipotizzato di creare graffi e scrostature, ho applicato una mano di Scratches Effects di Ammo Mig. Quest’ultimo crea uno strato idrosolubile che facilita l’eliminazione dei colori applicati successivamente.


COLOR SABBIA CHIARO – ha lo scopo di modulare il dunkelgelb (verso il chiaro) e di simulare i graffi che non incidono la vernice fino ad esporre il metallo.

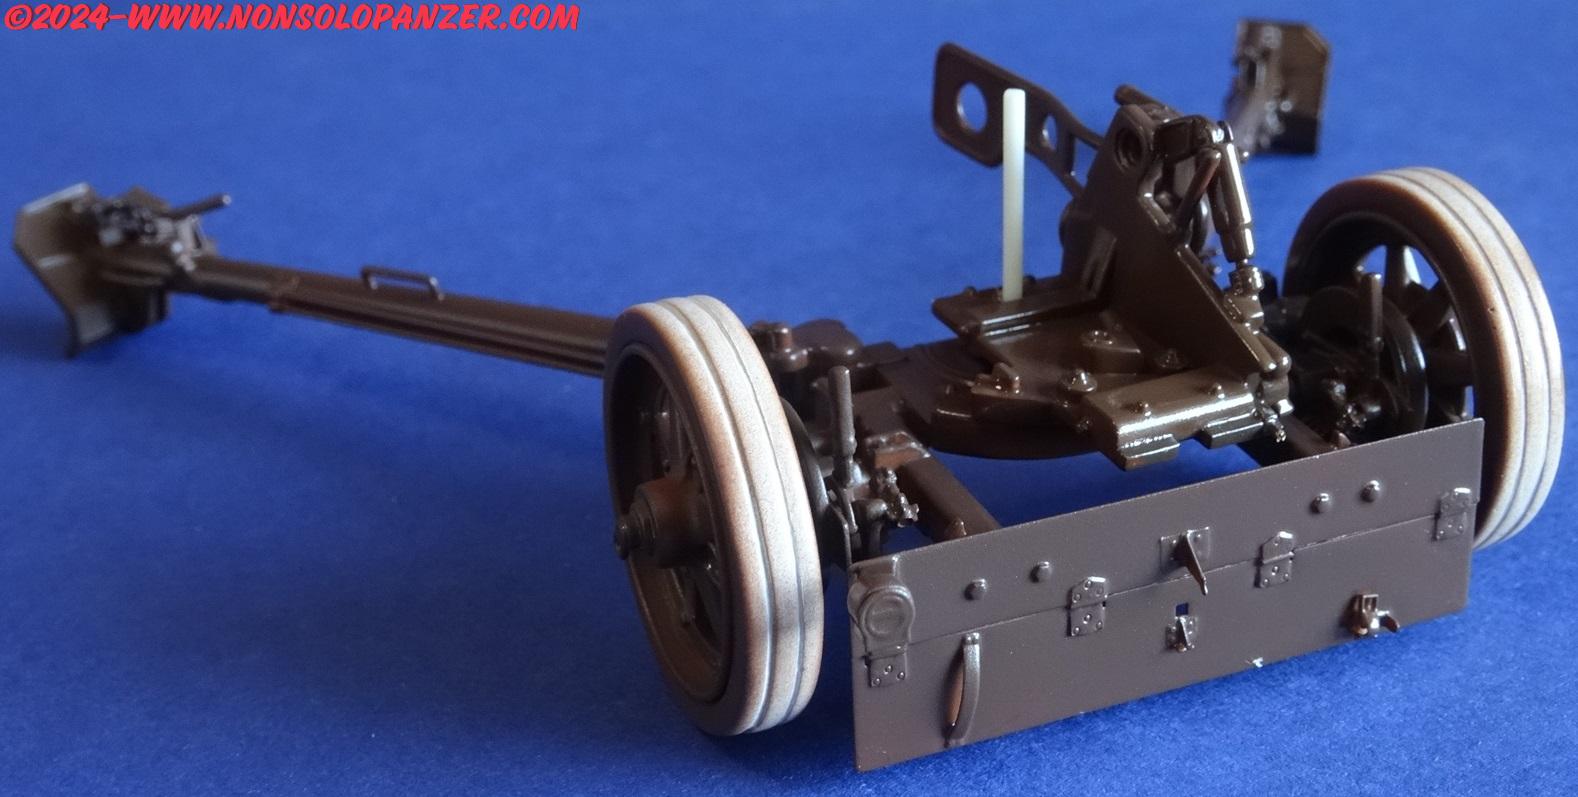
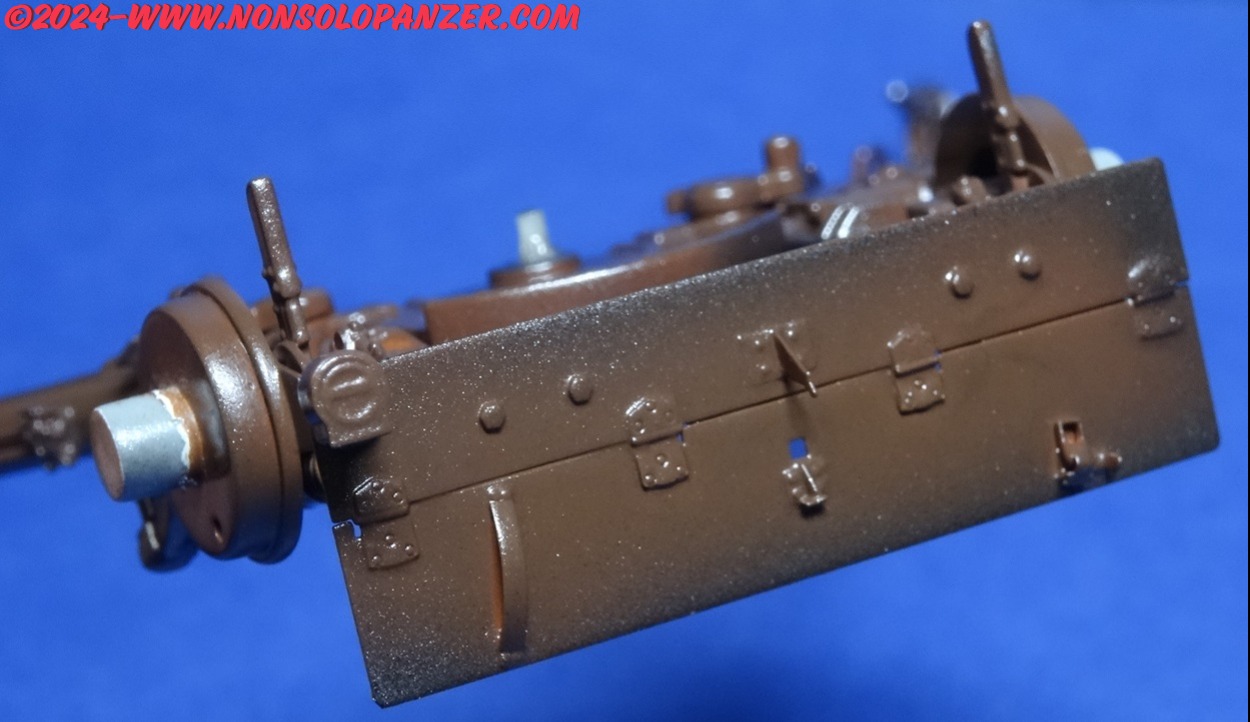
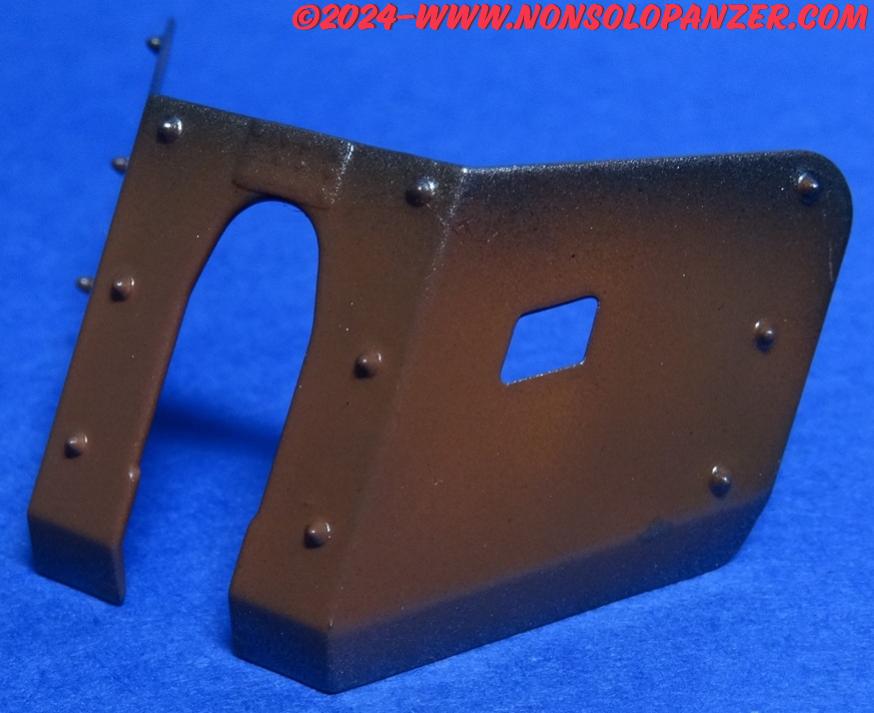
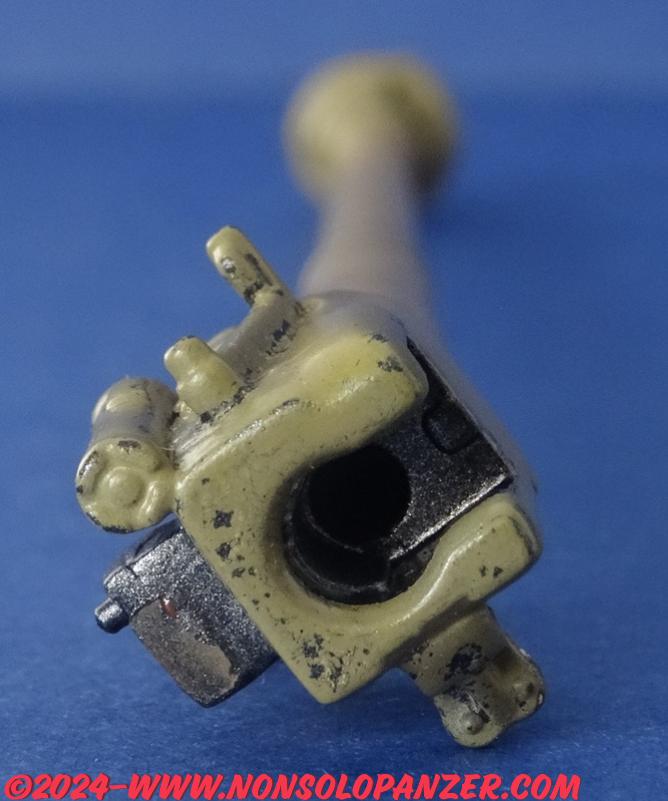
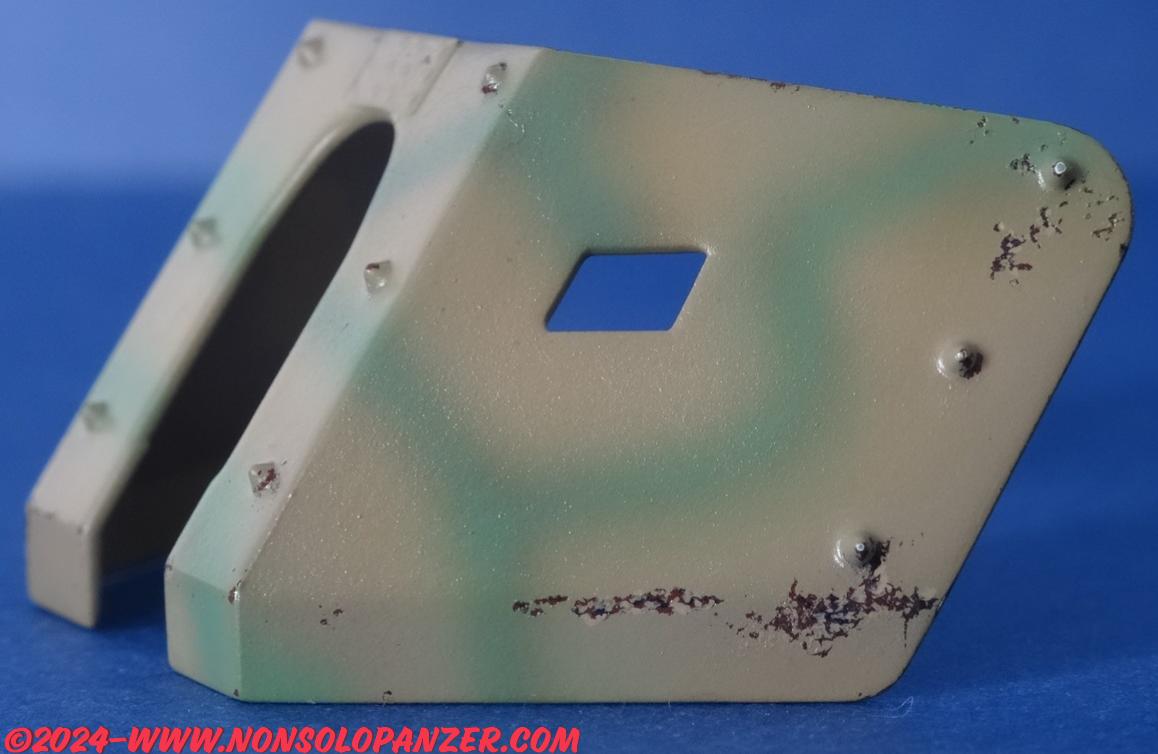
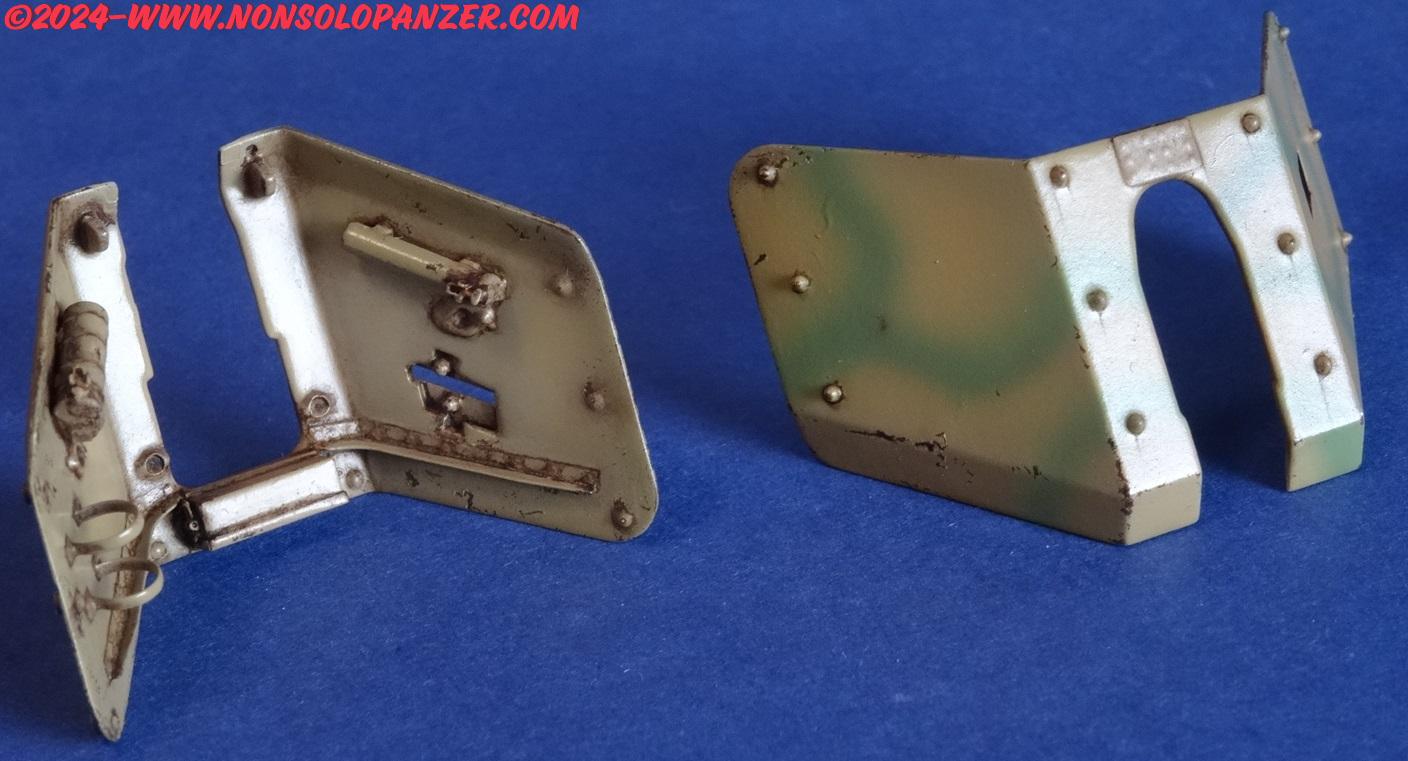
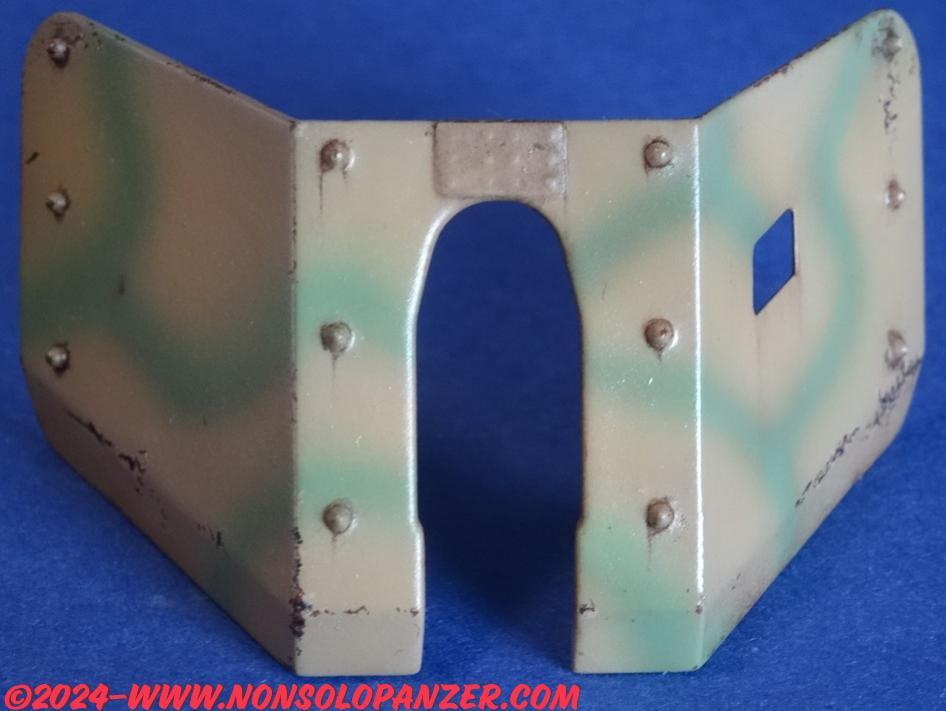
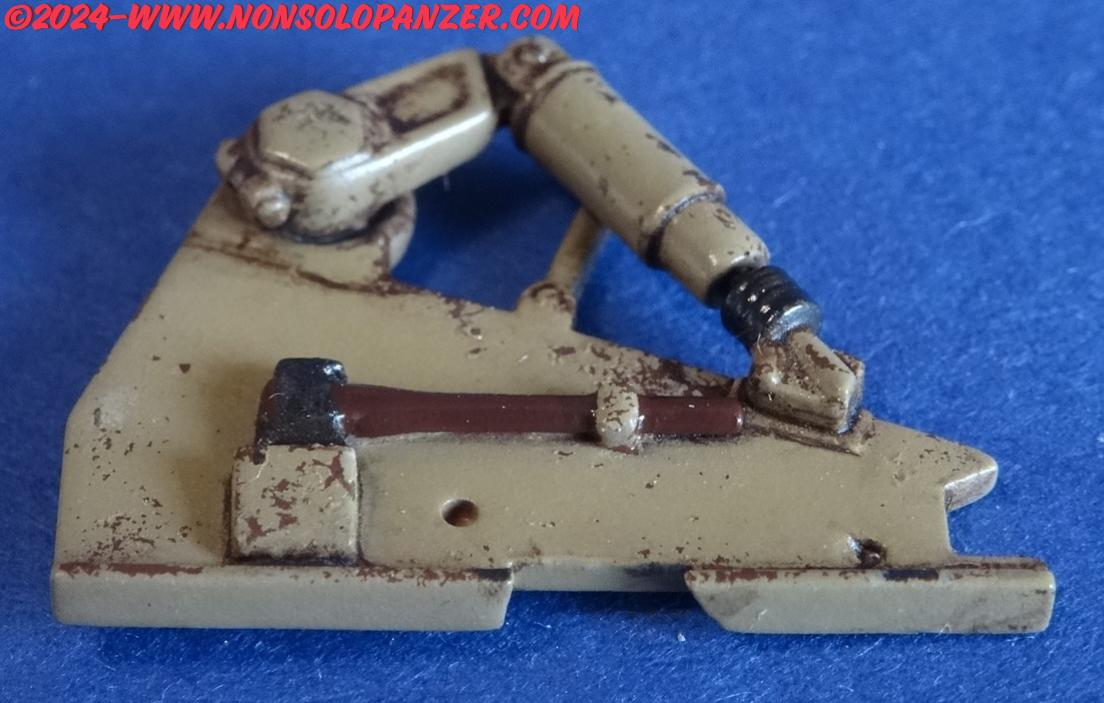
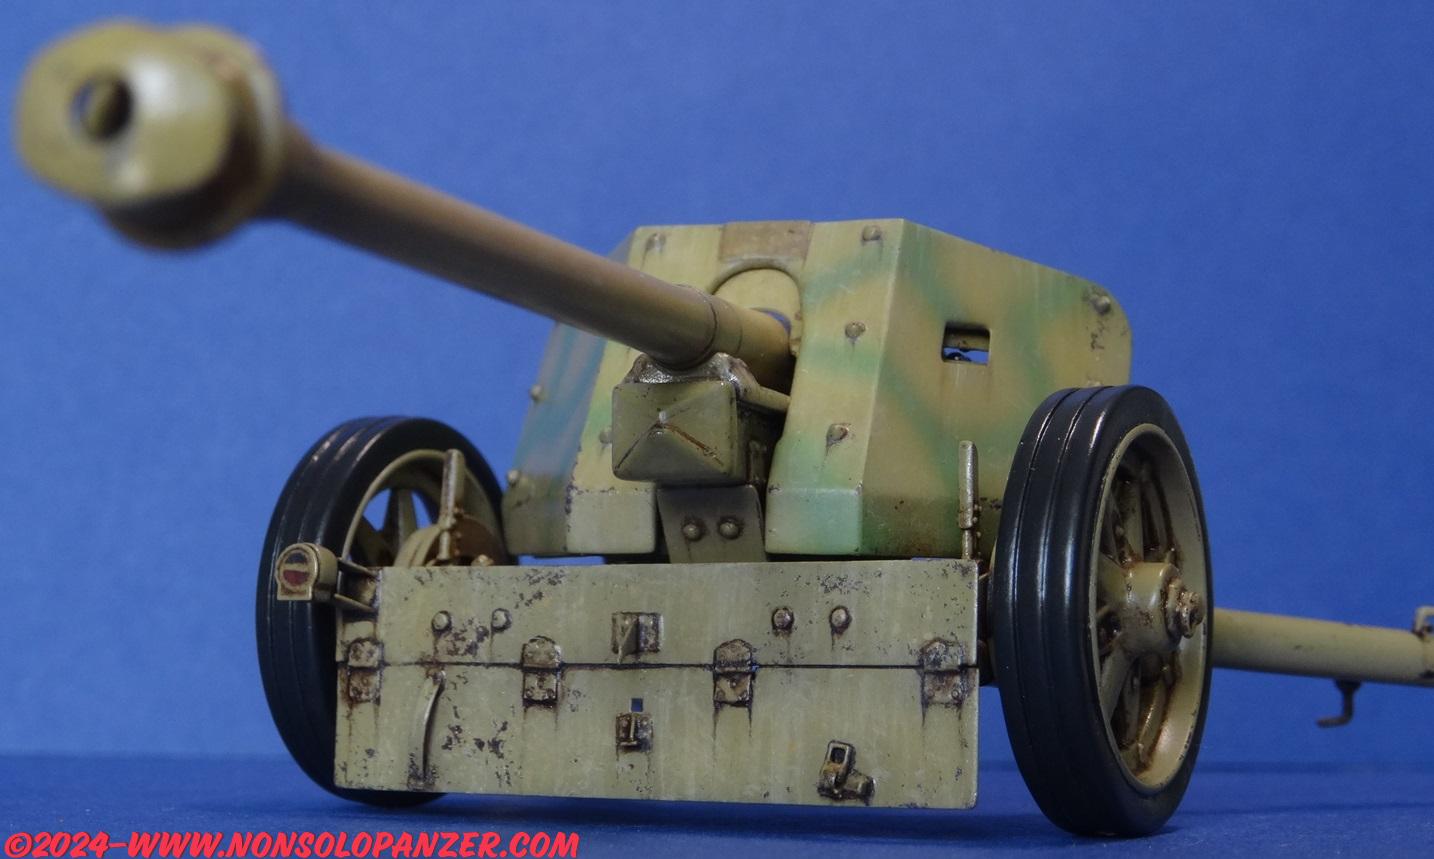
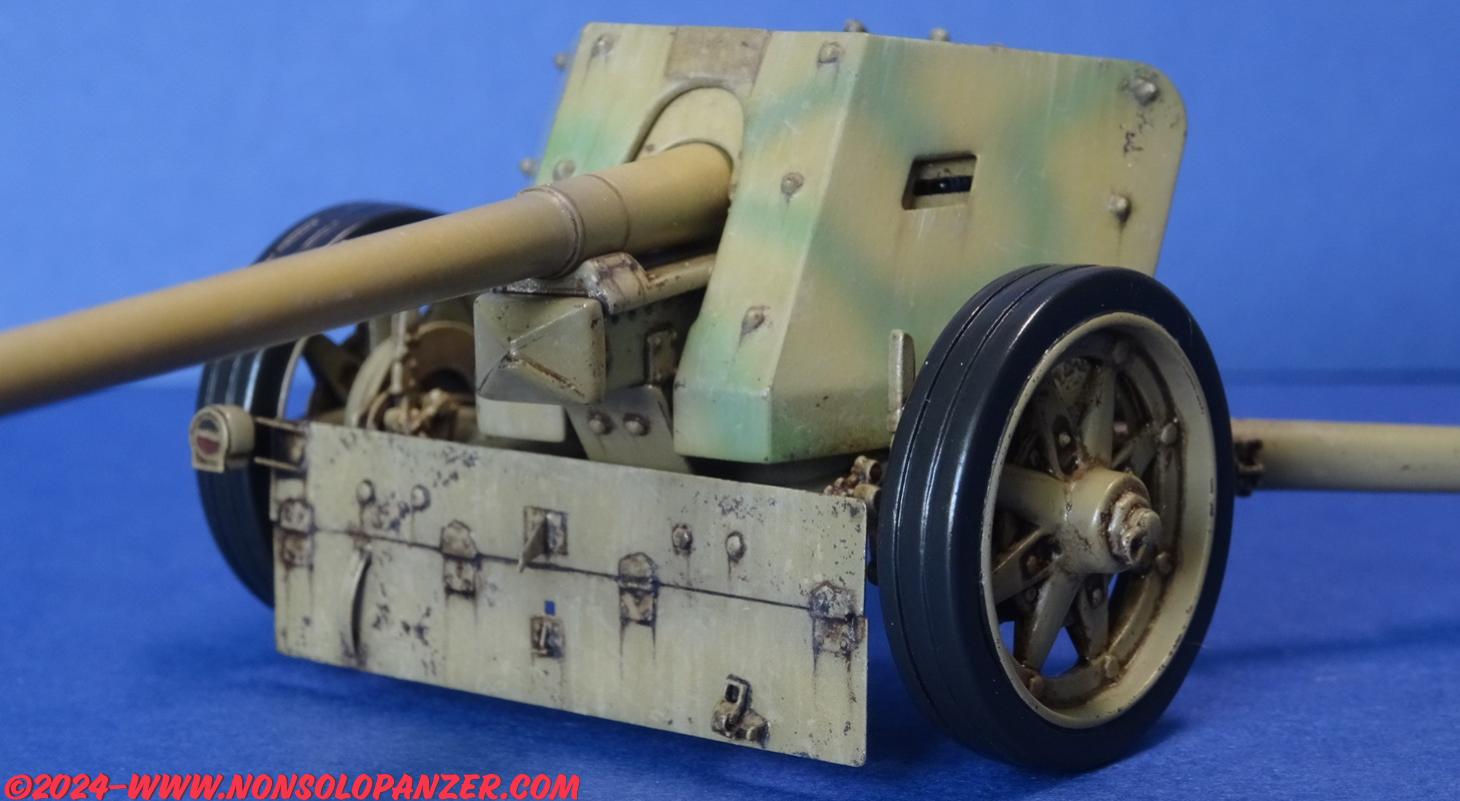
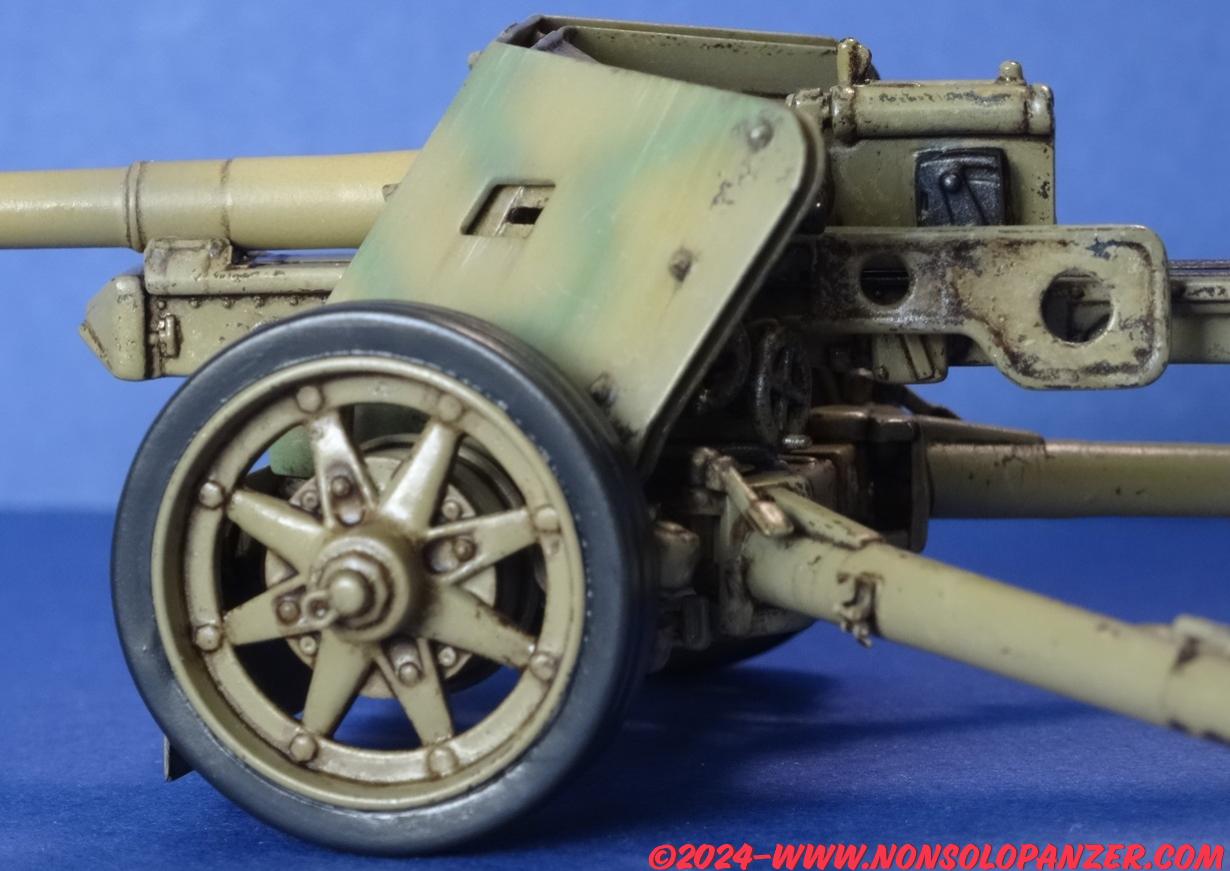
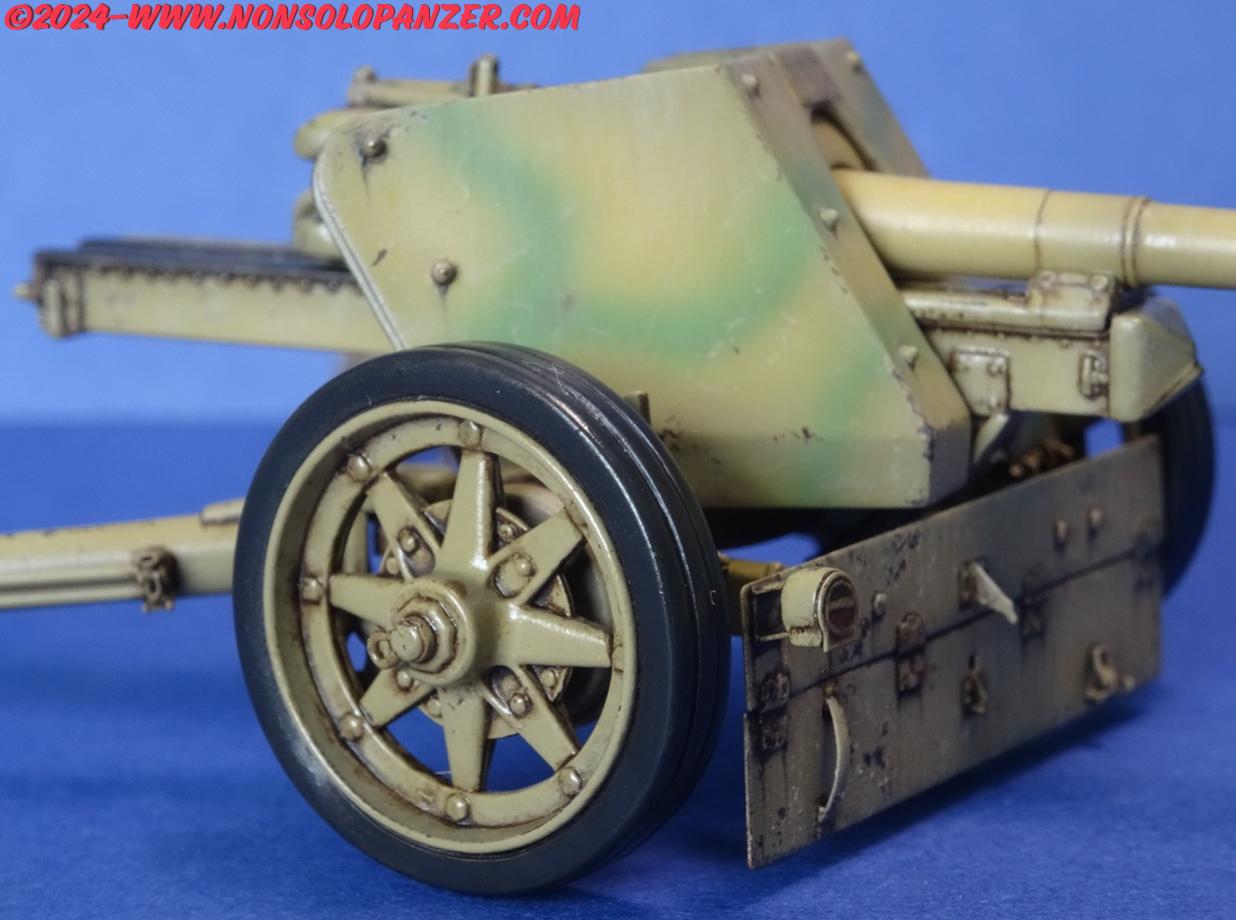
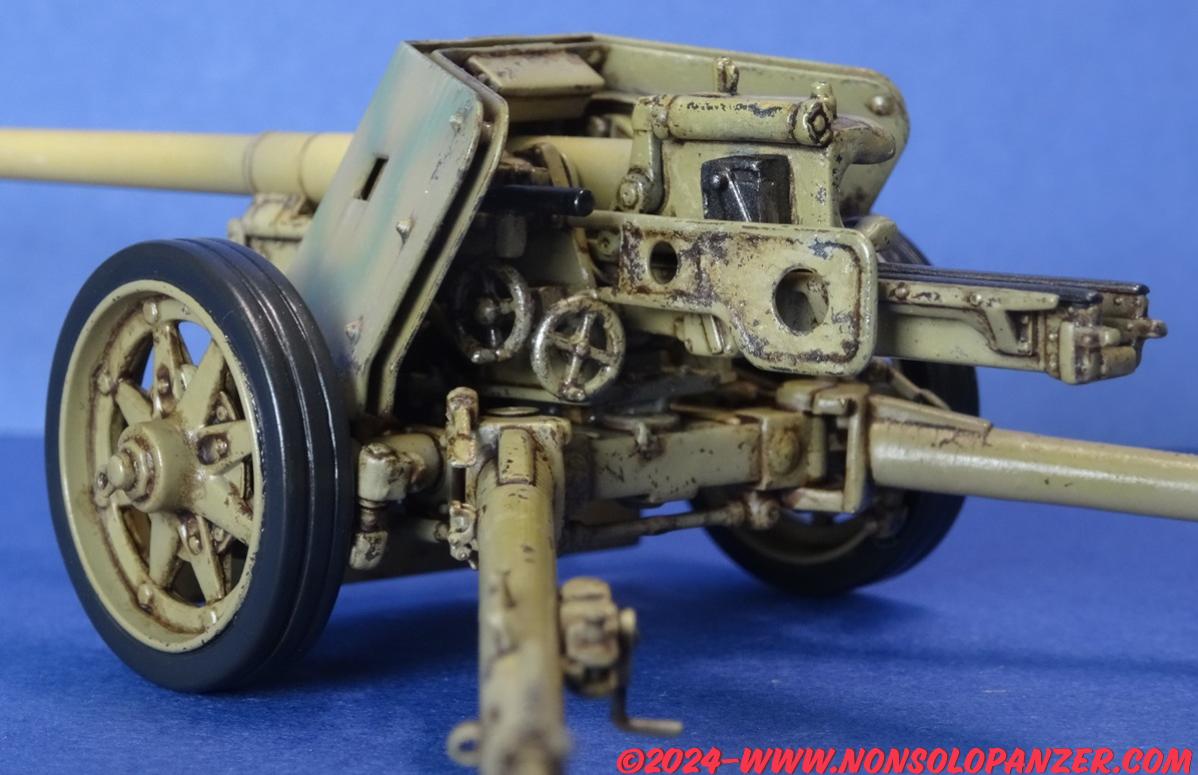
MIMETICA – il cannone è dipinto in dunkelgelb, il giallo sabbia usato in modo intensivo dall’esercito tedesco dal 1943. Come mimetica ho deciso di applicare poche linee di verde solo sullo scudo.


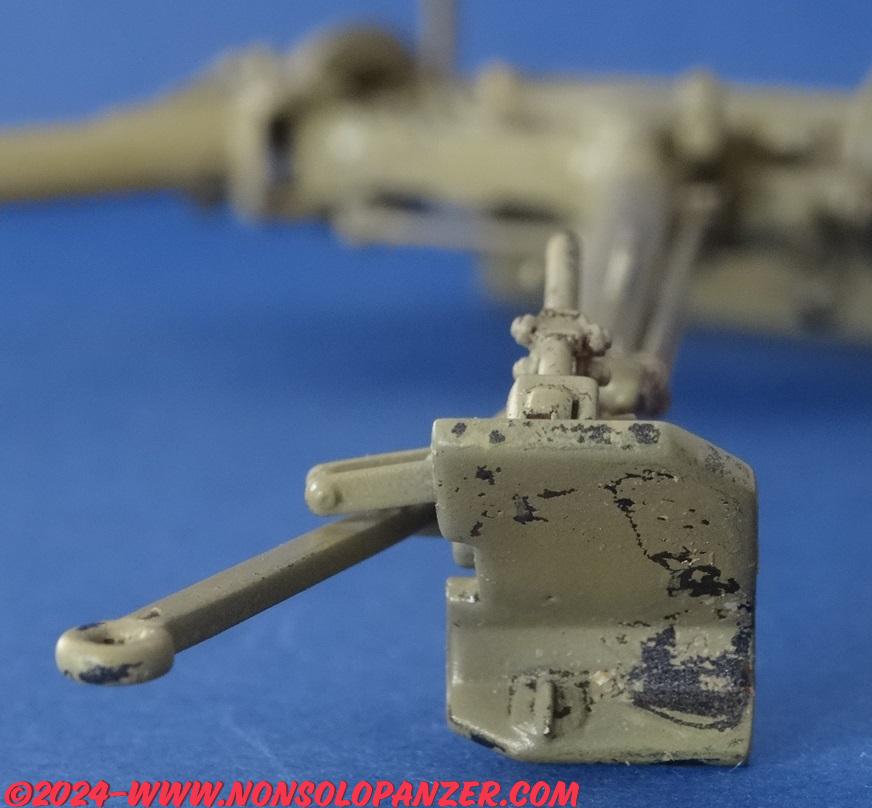
CHIPPING – con un pennello a setole dure inumidito in acqua ho creato graffi e scrostature nei punti che ho ritenuto più soggetti ad usura. Più acqua sia usa, più il colore viene eliminato facilmente. È necessario, quindi, essere molto morigerati a rischio di creare scrostature eccessive. È quanto, temo, è successo in molti punti del mio modello ma sono comunque soddisfatto del risultato.
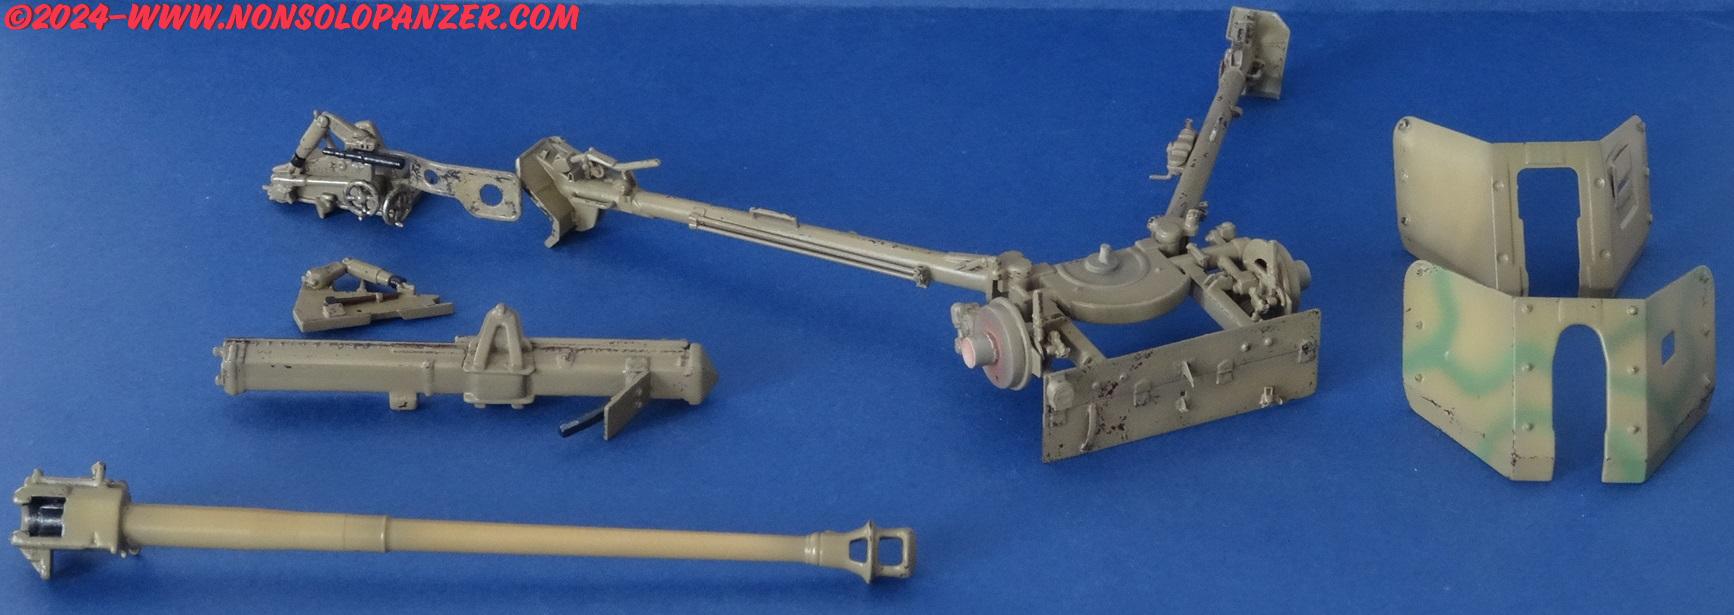

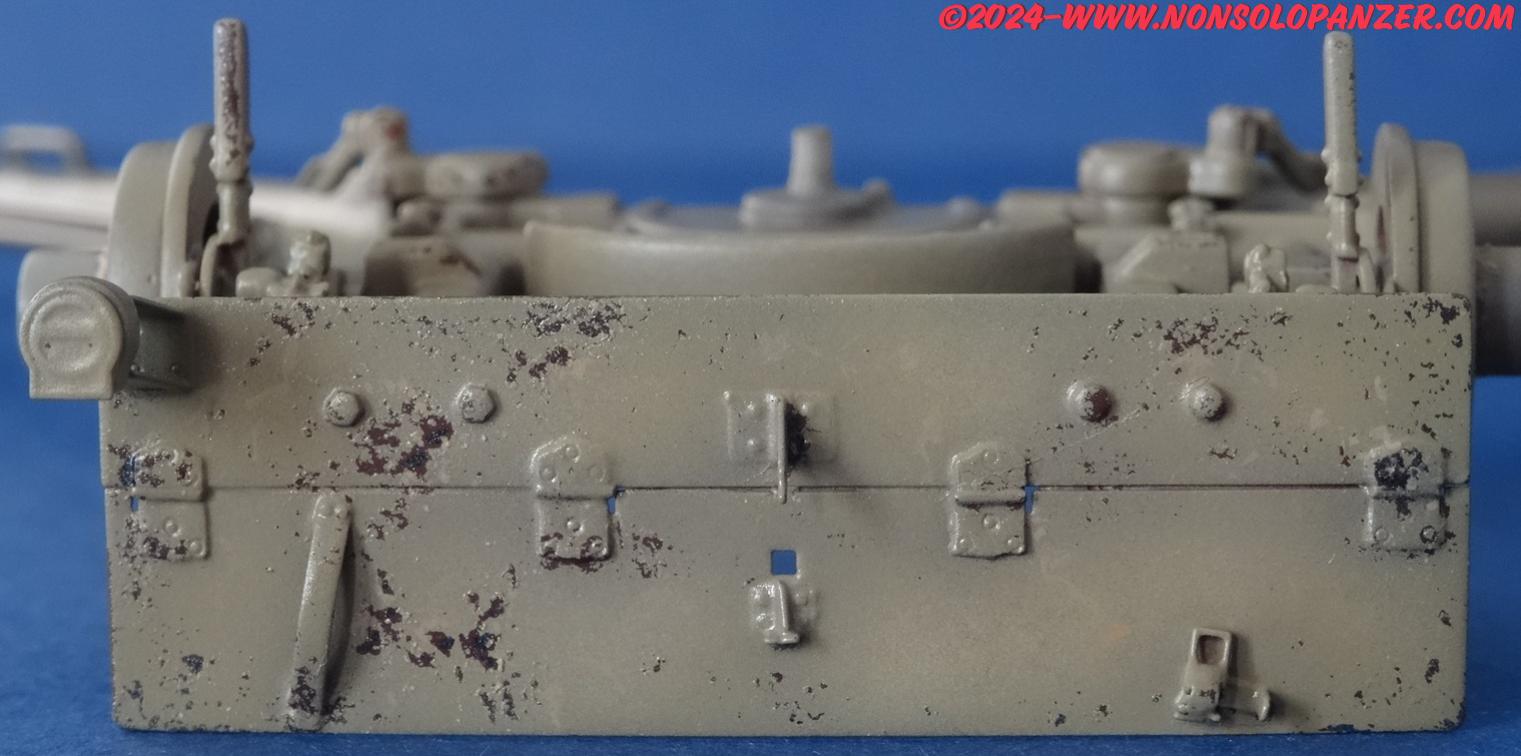

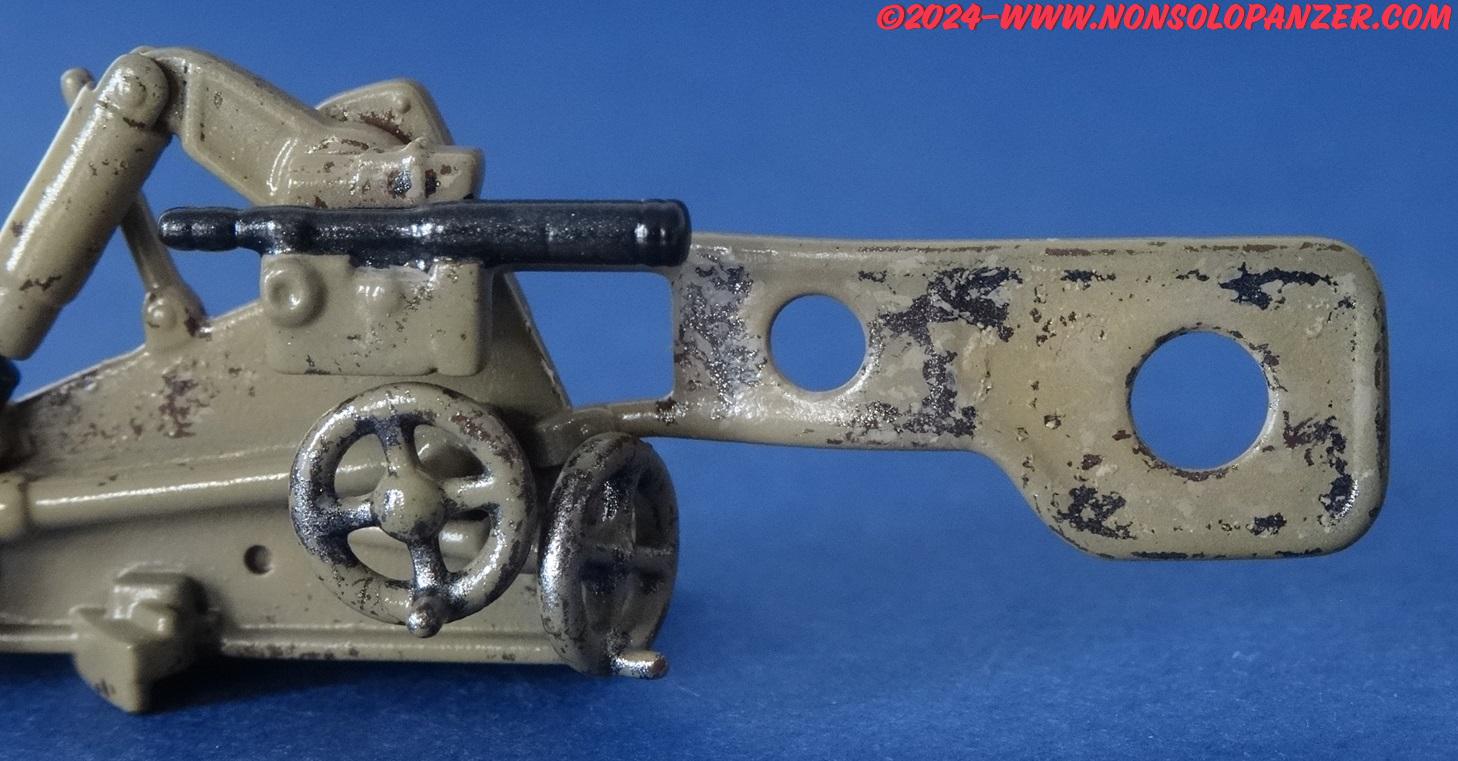
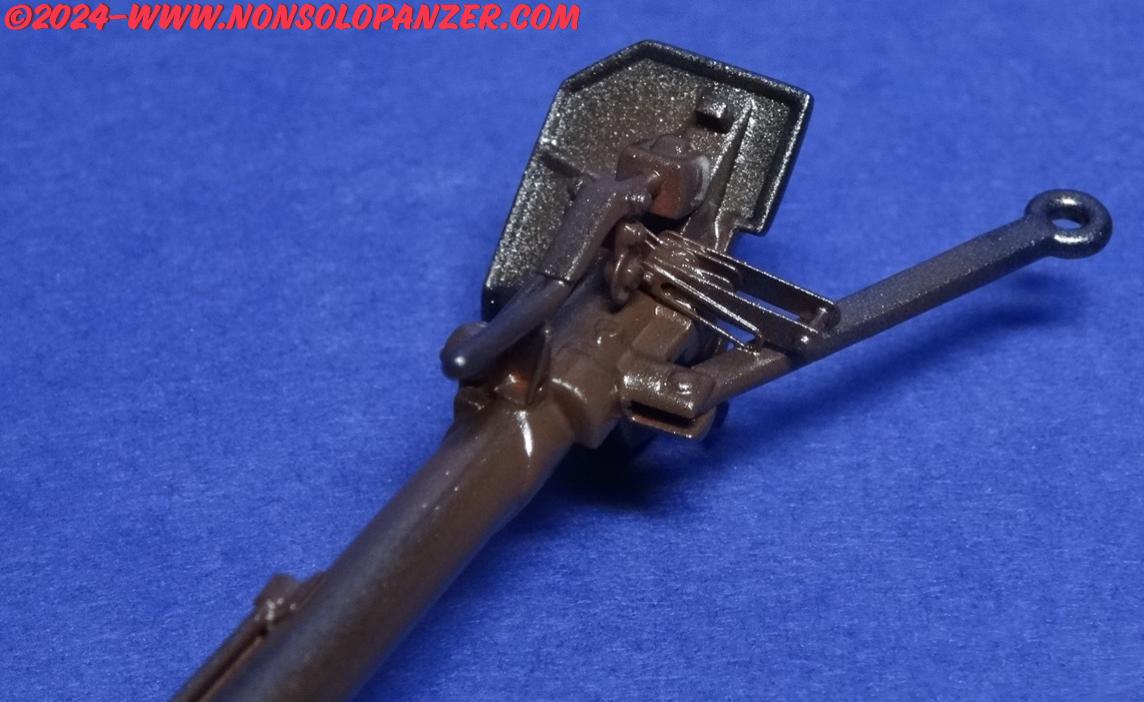
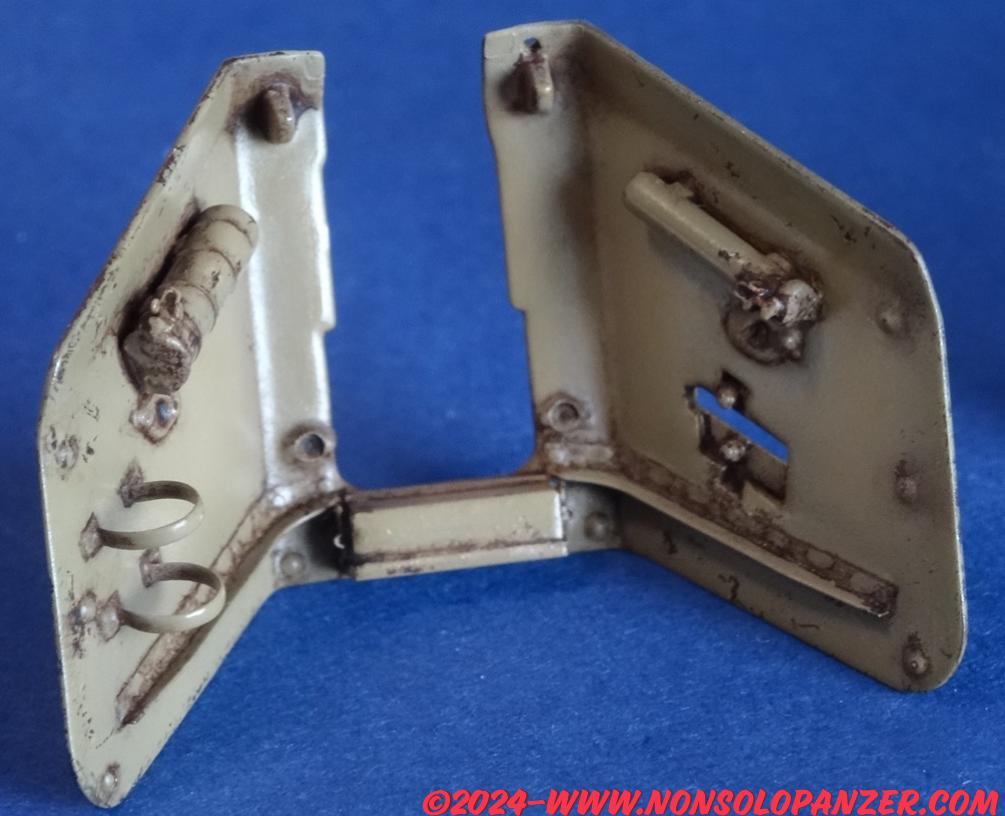
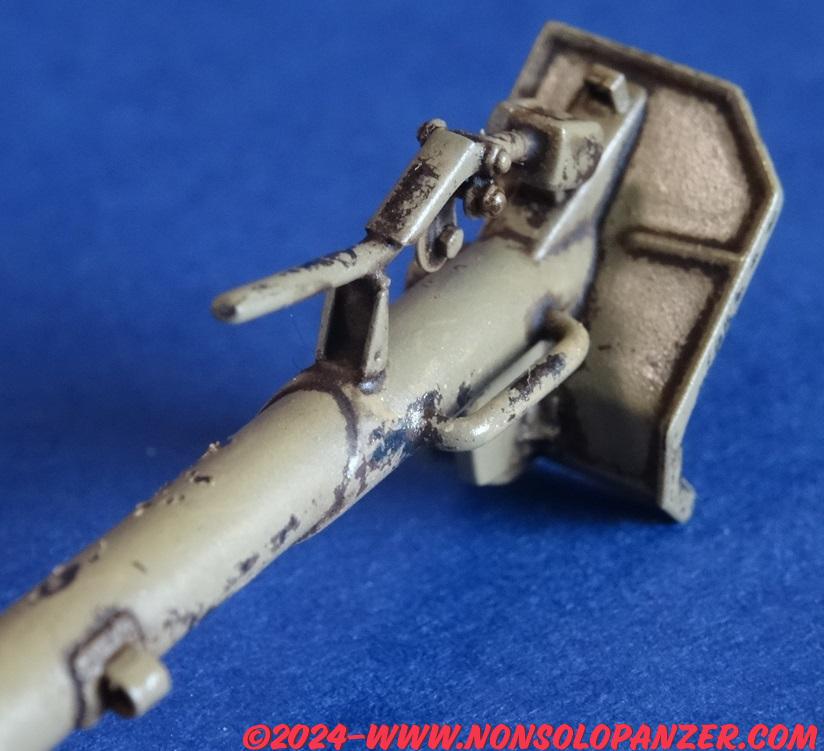
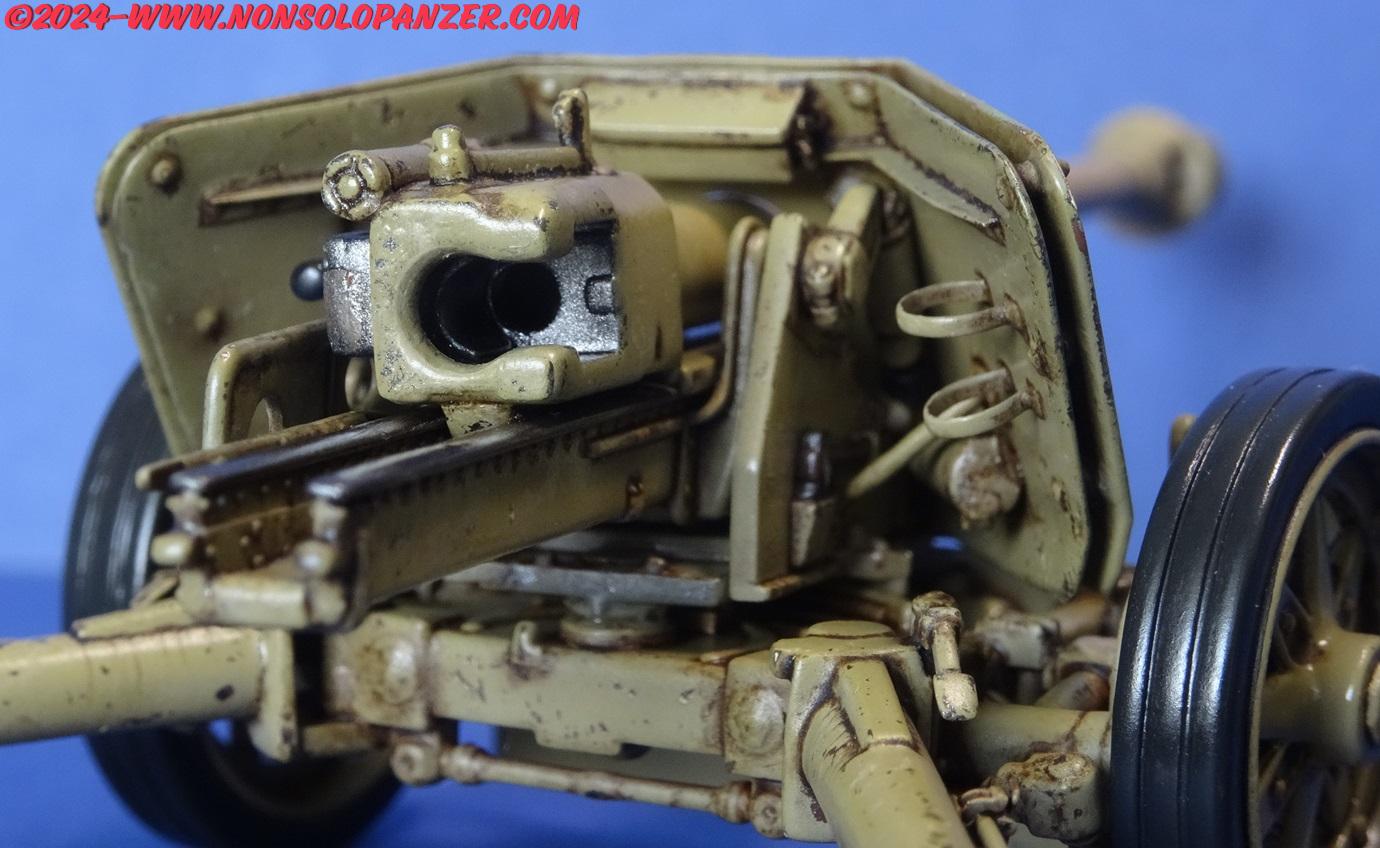
INVECCHIAMENTO – vari colori ad olio (marrone bruciato, ocra, pietra chiara, ecc.) applicati molto diluiti per capillarità o tirati verso il basso con un pennello piatto hanno permesso di simulare gli accumuli e le colature di sporco lungo tutto il cannone. Si tratta di lavori che, uniti ad un leggero dry brush di dunkelgelb molto chiaro, danno vita e tridimensionalità ad ogni modello in scala. PITTURA DETTAGLI – il mirino, l’interno della culatta ed altri elementi del cannone sono stati dipinti a pennello. In questa fase è essenziale consultare con attenzione le foto disponibili per ridurre quanto possibile errori.
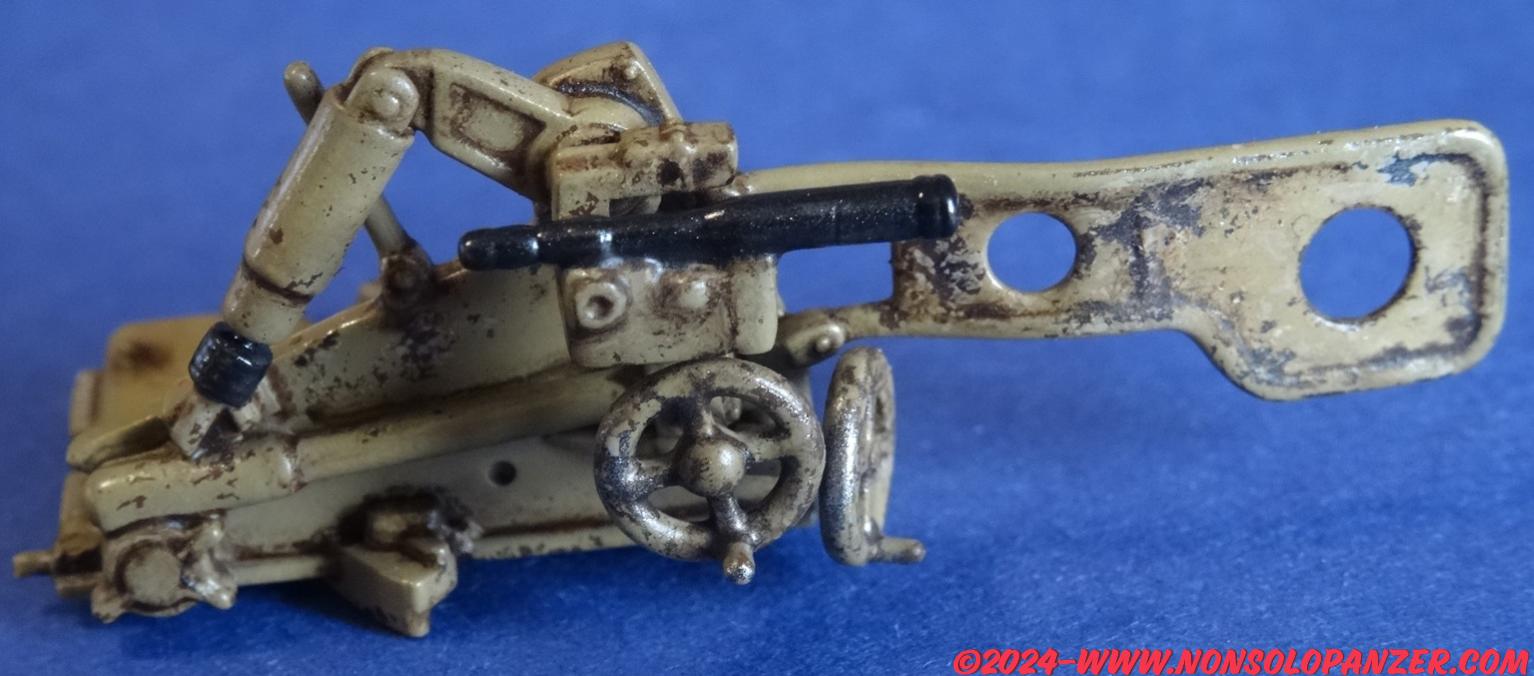


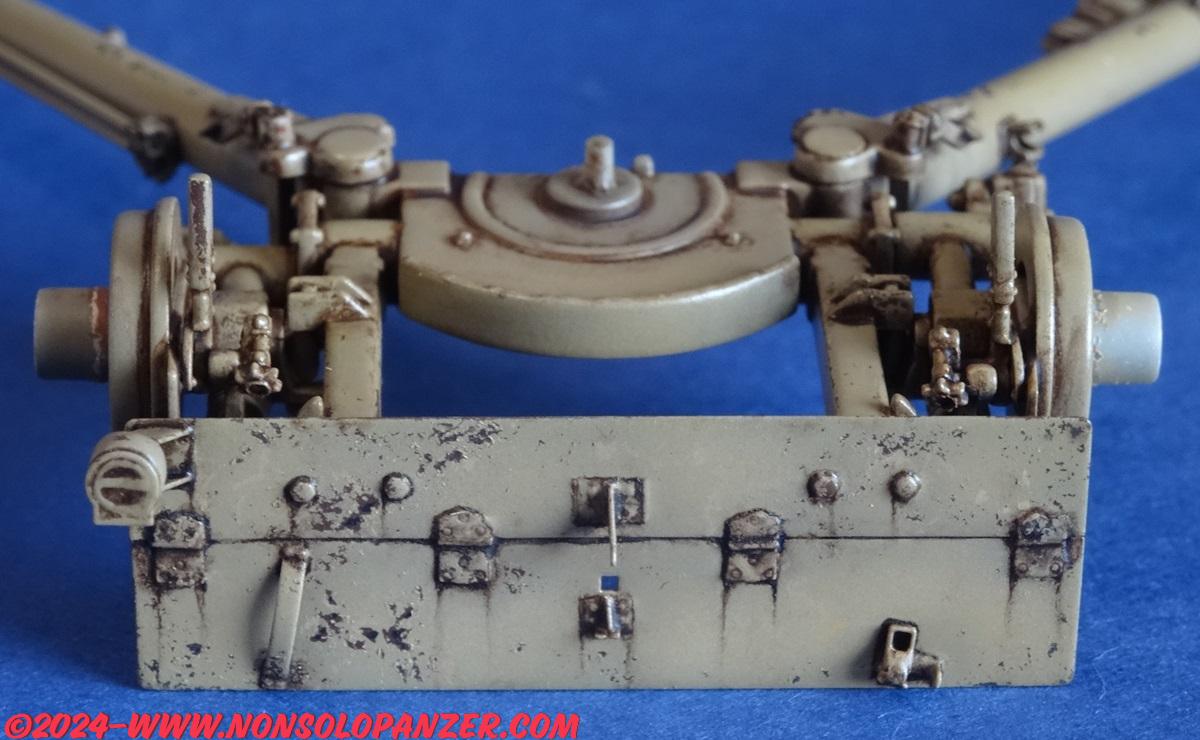

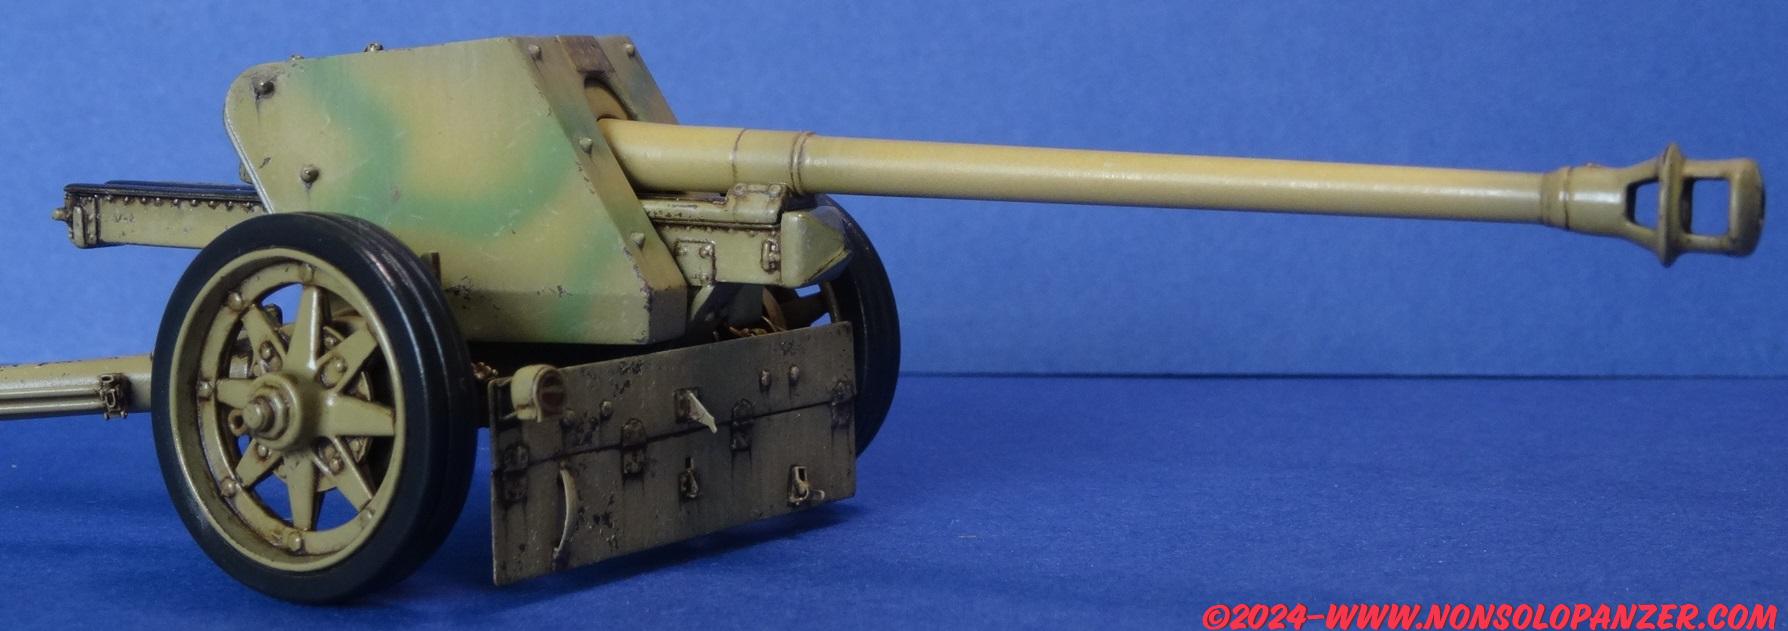
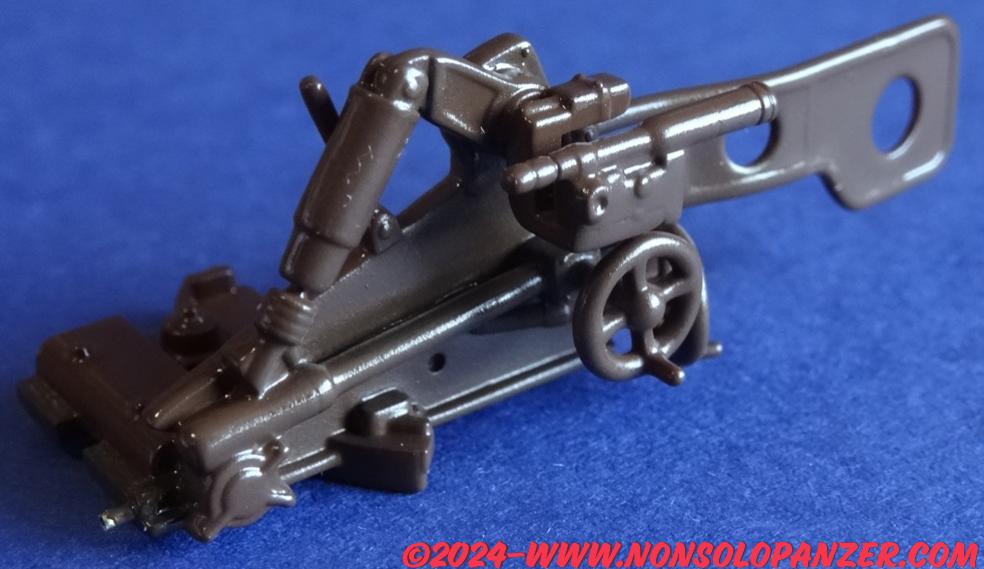
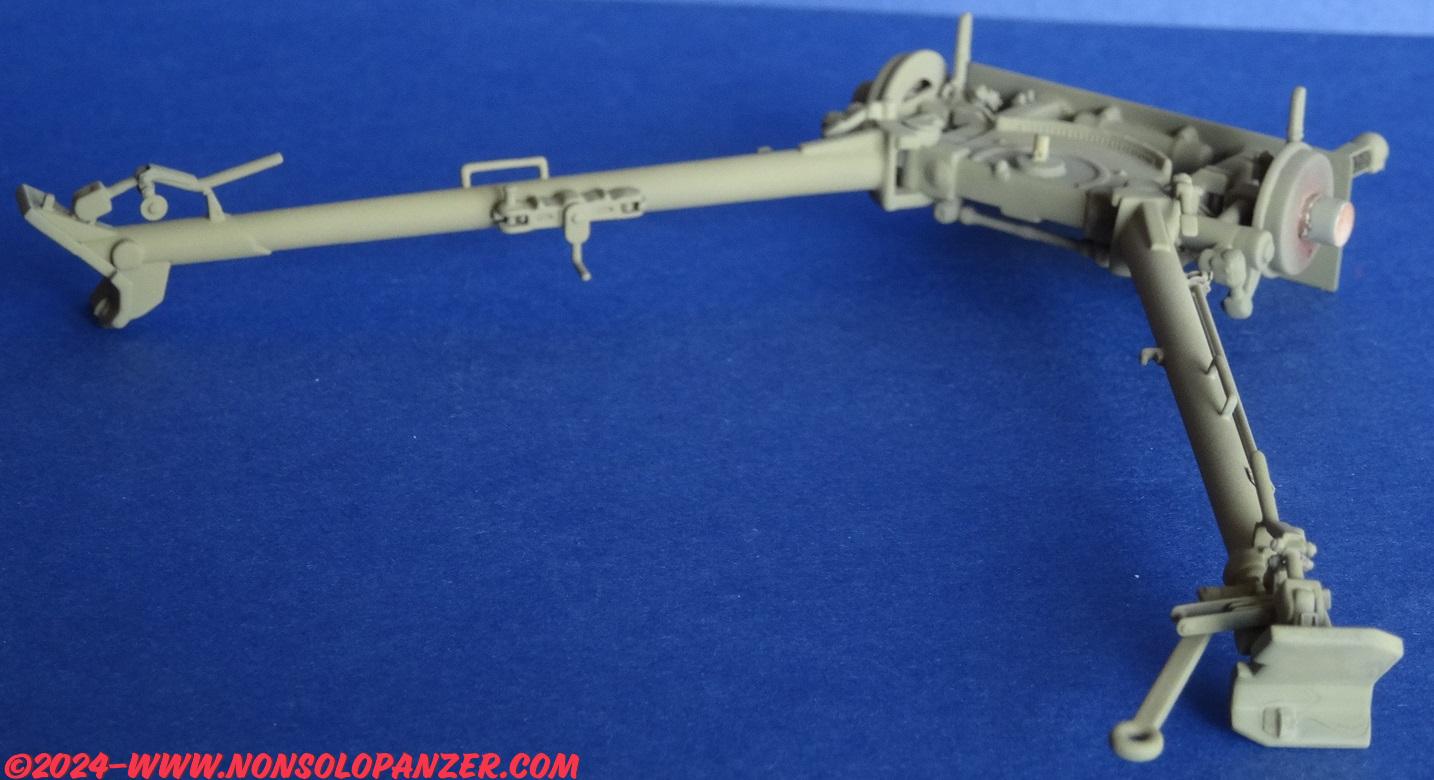
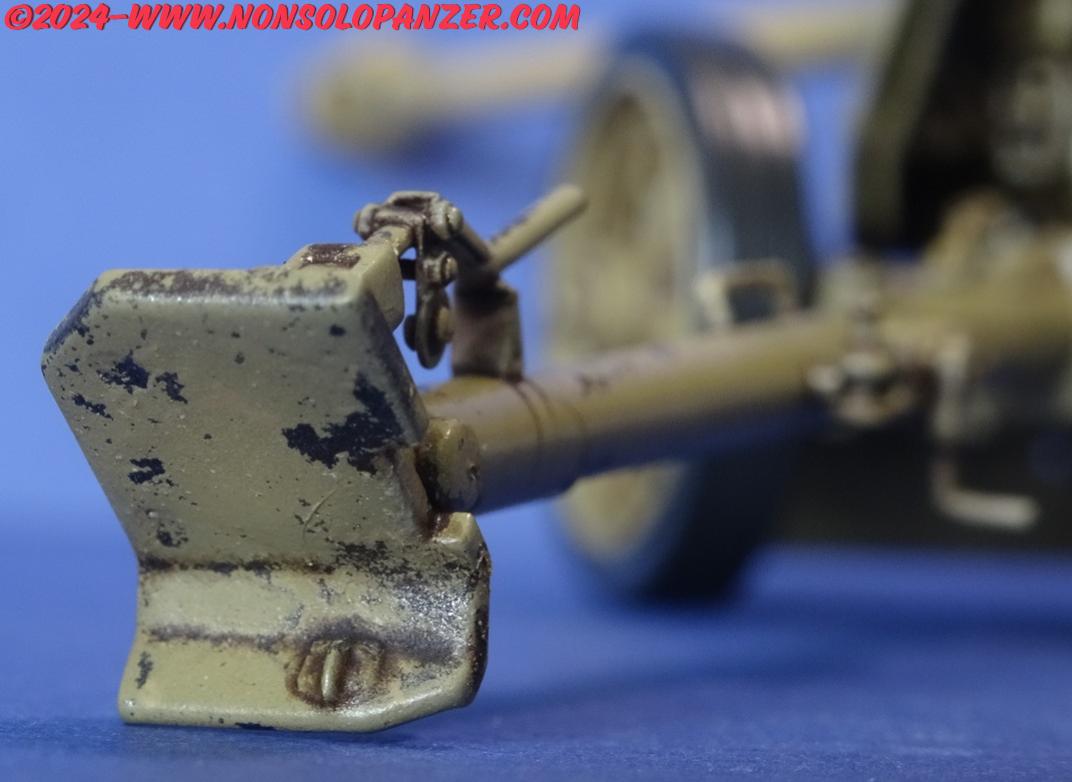
ASSEMBLAGGIO – i lavori sopra svolti mi hanno permesso di assemblare il cannone quasi totalmente. Ho lasciato separate le sole ruote per poter meglio gestire le ultime fasi dell’invecchiamento nonché il posizionamento del modello sul diorama. I riflessi che si vedono in foto sono dovuti alle coperture di trasparente lucido steso allo scopo di proteggere il colore sottostante nel corso delle varie fasi di pittura.

I riflessi lucidi verranno eliminati con il coprente opaco che stenderò solo a lavori sostanzialmente terminati. Per il momento la copertura protettiva lucida è molto utile perché necessito di maneggiare il cannone ancora a lungo. Ho, infatti, deciso di modificare in modo radicale i figurini che completeranno il diorama di questo Pak-40. Lo scopo è di creare una scena che ho in testa da molto tempo e, soprattutto, fare in modo che i figurini si adattino perfettamente ed in modo naturale ai volumi del cannone. Non è un lavoro facile ed è la prima volta che mi cimento in una tale impresa. Sono curioso di scoprire se raggiungerò i risultati sperati.
English Language
Although I have not been diligent in showing on this blog an accurate step by step of the work on the 7.5cm Pak-40 model by Dragon, I have completed about 80% of this subject, my current modeling venture. Below, I will entrust the narration of what has been done mainly by images. By doing so, I hope to help those who want to take inspiration from my work by avoiding potentially tedious descriptions. However, I would like to take this opportunity to point out the importance of obtaining accurate texts and historical photos of the subject you want to make to scale. The latter is often an underestimated aspect, especially by those who trust in the quality of the latest generation models. Although modern kits are far superior to the those of when I was a kid, ease of assembly and historical correctness is not necessarily assured. Photoetched and detail sets are not error-free either. This Dragon model and the set of E.T Models with which I tried to improve my Pak-40 are no exception.
I believe that the result of my efforts is appreciable, but it has only been possible thanks to the availability of some publications rich in technical profiles, historical photos, information and images of examples currently kept in museums and private collections. Equally useful were the photos I took of the 7.5cm Pak-40 admired live during my military-historical pilgrimages. This material made it possible to verify the accuracy of the Dragon model and the E.T Models photoengravings, compensate the lack of clarity of many steps shown in the assembly instructions, and clarify the operating of the gun mechanics. I add, although trivial, another piece of advice: each piece must be carefully tested before being glued, especially to make sure that the assembly proposed by the instructions is actually possible. I have many doubts about this last aspect, given the many times I have preferred to proceed with personal intuition. An initiative that, it must be said, guaranteed me an easy and linear assembly of the gun.
Collecting technical and historical information also has a drawback: it allows you to gain serious awareness of the poor accuracy of a model. Photos and technical diagrams in hand, it makes you want to remake all. Photoetched compensate only in part because they are, in many cases, invented or unusable except for excessive complications. As for the Dragon kit, it includes a turned metal barrel that, at least in my case, was slightly curved. I compensated by positioning it in relation to the carriage so that the defect is not perceptible but it is a serious problem that justifies the purchase of a replacement, preferably including muzzle brake and well-detailed breech. The same goes for the wheels proposed by the kit with the black rubber tread. Considering the difficulties of coloring the tire, I preferred to replace them with resin wheels which, to be honest, do not have any additional detail compared to the plastic ones in the kit.
Having said all this, here is a quick summary of the various assembly/coloring steps.
PHOTO-ETCHING and MAIN ASSEMBLY – the gaps between the various pieces were filled with white putty, which was also used to simulate welding in some places.
PRIMER – unfortunately I used the white Tamiya primer for plastic and metal which was not very thick. Because of this, I had to roll out multiple coats which created too much thickness.
BROWN BASE – acts as the background and first modulation factor of the dunkelgelb (towards the dark).
METAL COLOR – it’s the first time I’ve approached this technique. After having applied some dark metal with an airbrush only in the parts where I hypothesized to create scratches and peeling, I applied a coat of Scratches Effects by Ammo Mig. The latter creates a water-soluble layer that facilitates the elimination of the colors applied later.
LIGHT SAND COLOR – it is intended to modulate the dunkelgelb (towards the light) and to simulate scratches that do not cut the paint to the point of exposing the metal.
CAMOUFLAGE – The cannon is painted in Dunkelgelb, the sand yellow used intensively by the German army since 1943. As a camouflage, I decided to apply a few lines of green only on the shield.
CHIPPING – with a hard brush dampened in water I created scratches and peels in the places that I considered most subject to wear. The more water you use, the more easily the color is eliminated. It is necessary, therefore, to be very moderate at the risk of creating excessive peeling. That’s what, I’m afraid, happened in many places on my model, but I’m still satisfied with the result.
WEATHERING – various oil paints (burnt brown, ochre, light stone, etc.) applied very diluted by capillarity or pulled downwards with a flat brush made it possible to simulate the accumulation and dripping of dirt along the entire cannon. These are works that, combined with a light dry brush with a clear, give life and three-dimensionality to each scale model. DETAIL PAINTING – the sight, the inside of the breech and other elements of the gun have been painted with a brush. At this stage, it is essential to carefully consult the available photos to reduce errors as much as possible.
ASSEMBLY – the work carried out above allowed me to assemble the gun almost entirely. I left only the wheels separate in order to better manage the last stages of weathering as well as the positioning of the model on the diorama. The reflections that can be seen in the photo are due to the glossy transparent coatings applied in order to protect the underlying colors during the various phases of painting.
Glossy reflections will be eliminated with the opaque coating that I will apply only when the work is substantially finished. For the time being, the glossy protective cover is very useful because I need to handle the gun for a long time. I have, in fact, decided to radically modify the figures that will complete the diorama of this Pak-40. The aim is to create a scene that I have had in mind for a long time and, above all, to make sure that the figures adapt perfectly and naturally to the volumes of the cannon. It’s not an easy job and it’s the first time I’ve tried my hand at such an undertaking. I’m curious to find out if I’ll achieve the desired results.
